New to Creazy? Creazy Tutorial (2026.02)
Creazy Tutorial
Welcome! 😊
We're truly glad to have you here at Creazy.
In this guide, we'll walk you through everything from creating a product detail page, editing in the studio, to using the newly added toolbar and drag-and-drop features.
Follow along step by step, and anyone can easily create a product detail page!
After Logging In
Create New Design
Here, a design refers to one product detail page.
To create a product detail page, please click the Create New Design button.
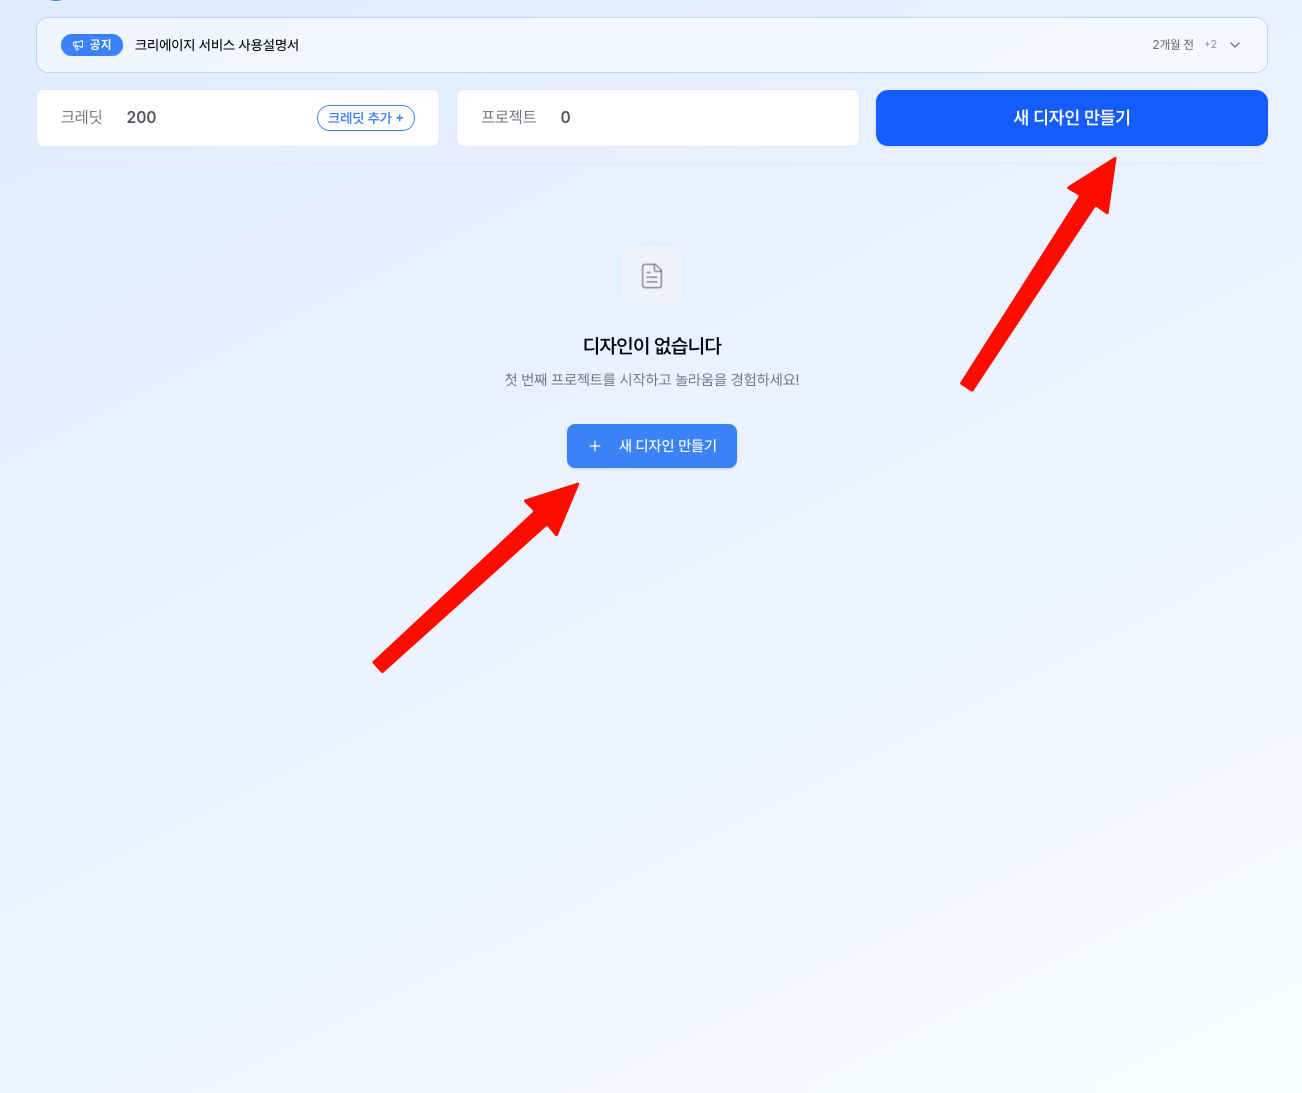
After logging in, you'll see the dashboard screen shown above.
Do you see the "Create New Design" button in the center?
Click this button to start creating your product detail page right away.
If you've created designs before, you can also view and edit them from this screen.
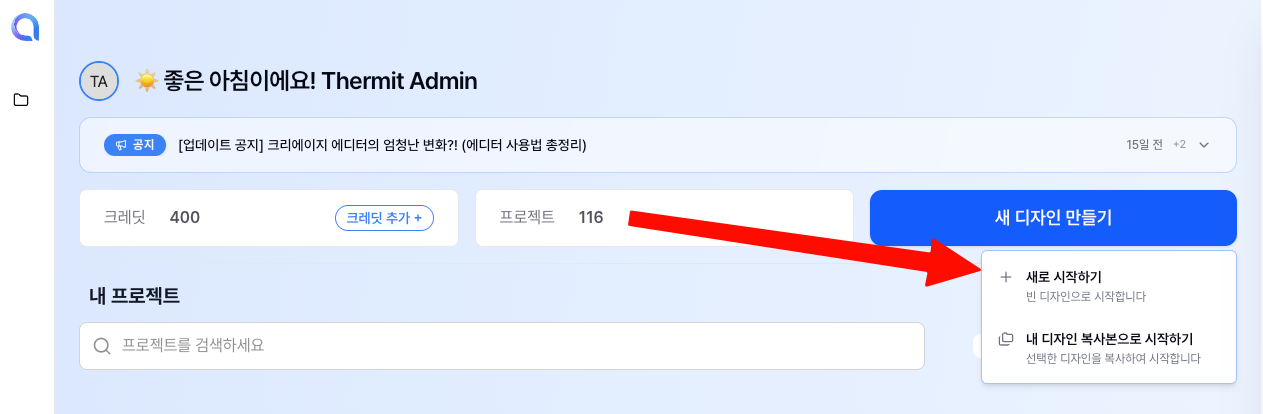
After clicking the button, you'll see the selection screen shown above.
If you're starting for the first time, click the "Start from Scratch" button.
You can create a completely new product detail page from the ground up.
Entering Basic Project Information
Product Name
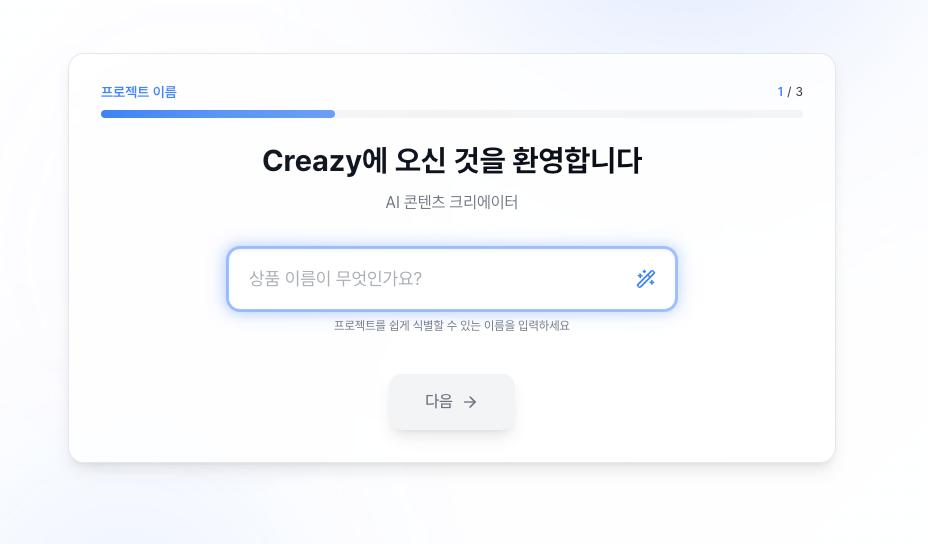
The first step is to enter your product name.
Please type the name of the product you're selling.
For example, "Premium Wireless Earbuds" or "Handmade Strawberry Jam."
This name will be used as the base information when the AI writes the detail page content, so it's best to enter the actual product name you'll be using for sales.
Select Content Type

Next is the screen where you select your content type.
For now, please select Product Detail Page.
After selecting, click the Next button.
In the future, more content types such as banners and thumbnails will be added, so stay tuned!
Select Category

Now, please select the category that matches your product.
It's important to choose the right category because:
For each category,
✔ Design templates optimized for that product type
✔ Layout structures proven to work well on best-selling detail pages
are pre-configured.
For example, the Food category automatically applies appetite-stimulating layouts, while the Fashion category emphasizes outfit photos.
Select the category closest to your product, and the AI will be able to create much better results for you.
Writing the Plan
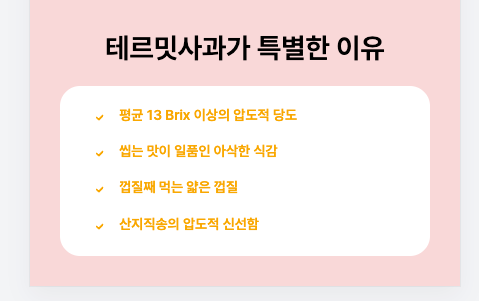
This step is the core stage where you input the actual content for your detail page.
You'll enter information like your product's features, benefits, usage instructions, and more—everything you want to communicate to your customers.
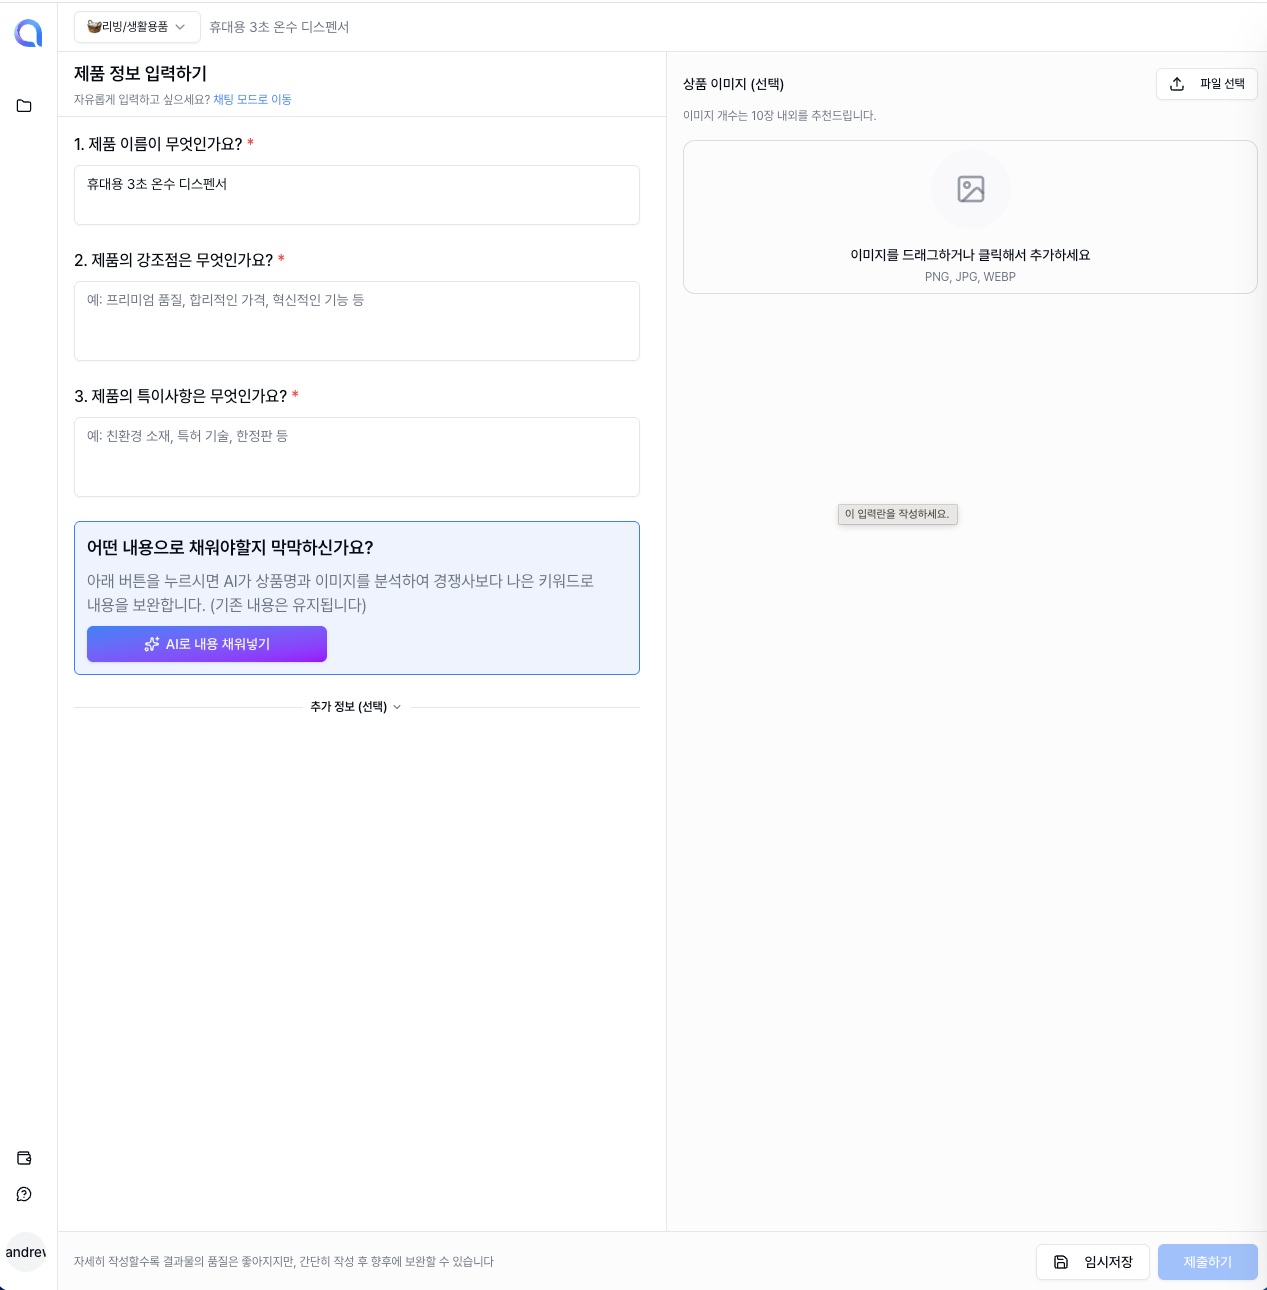
As shown above, fill in the content for each field.
You can type it in yourself, or use the AI auto-write feature explained below for much greater convenience.
Upload Photos
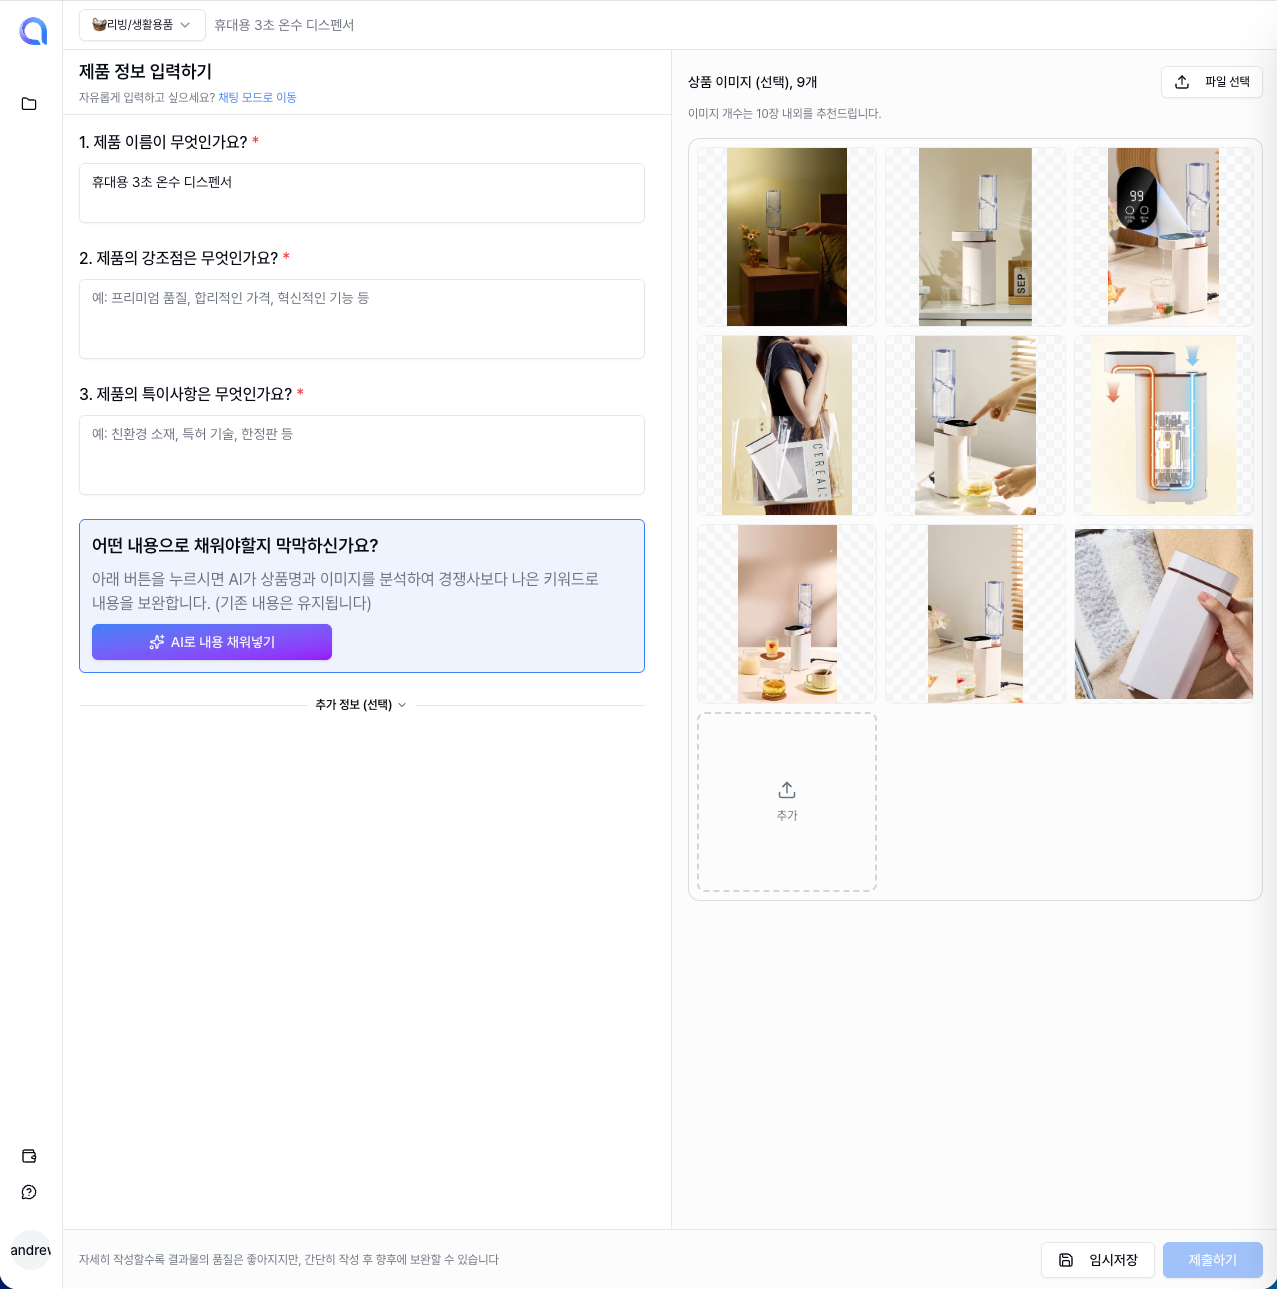
Please upload your product photos.
It's no exaggeration to say that the quality of a detail page is determined by the photos!
The more photos you upload, the more diverse compositions and layouts the AI can use to design your detail page. We recommend uploading as many product photos as possible.
Photos from various angles—front, side, detail shots, usage scenes—are especially helpful.
Auto-fill Content with AI
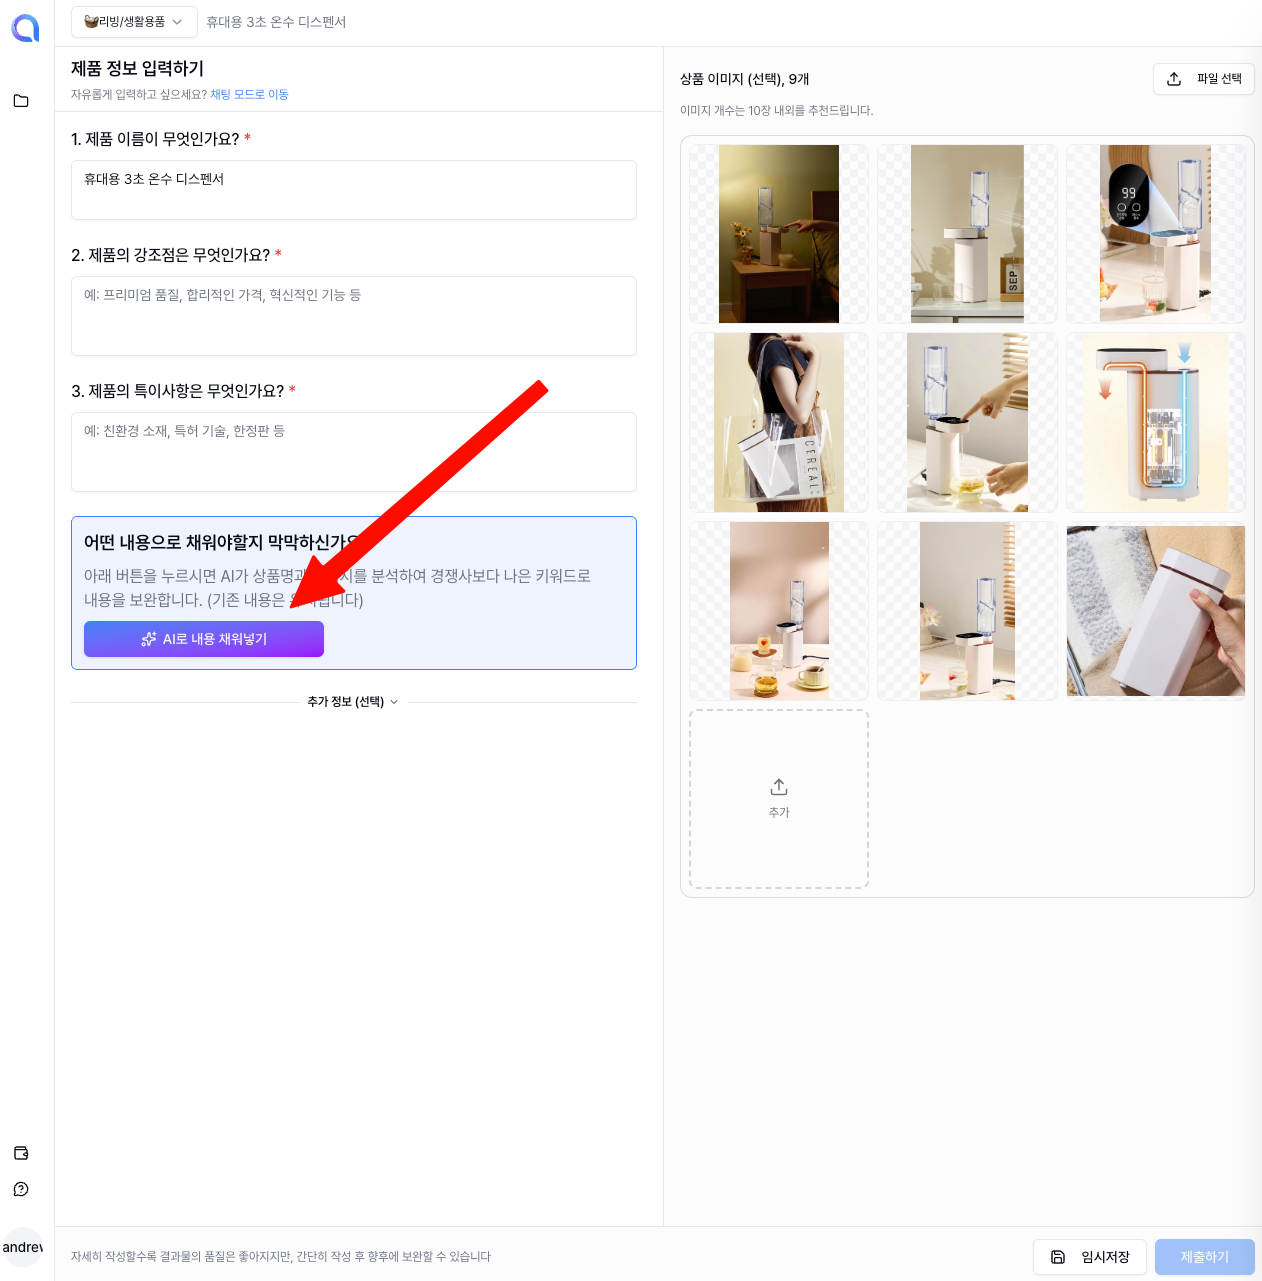
Finding it difficult to write the plan yourself? Don't worry!
AI will automatically write the detail page content for you.
Based on the product name, category, and uploaded photos you've provided, the AI analyzes your product's features and selling points and auto-fills the plan.
After reviewing the AI-generated content, just edit the parts you're not happy with—saving you a lot of time.
Save as Draft
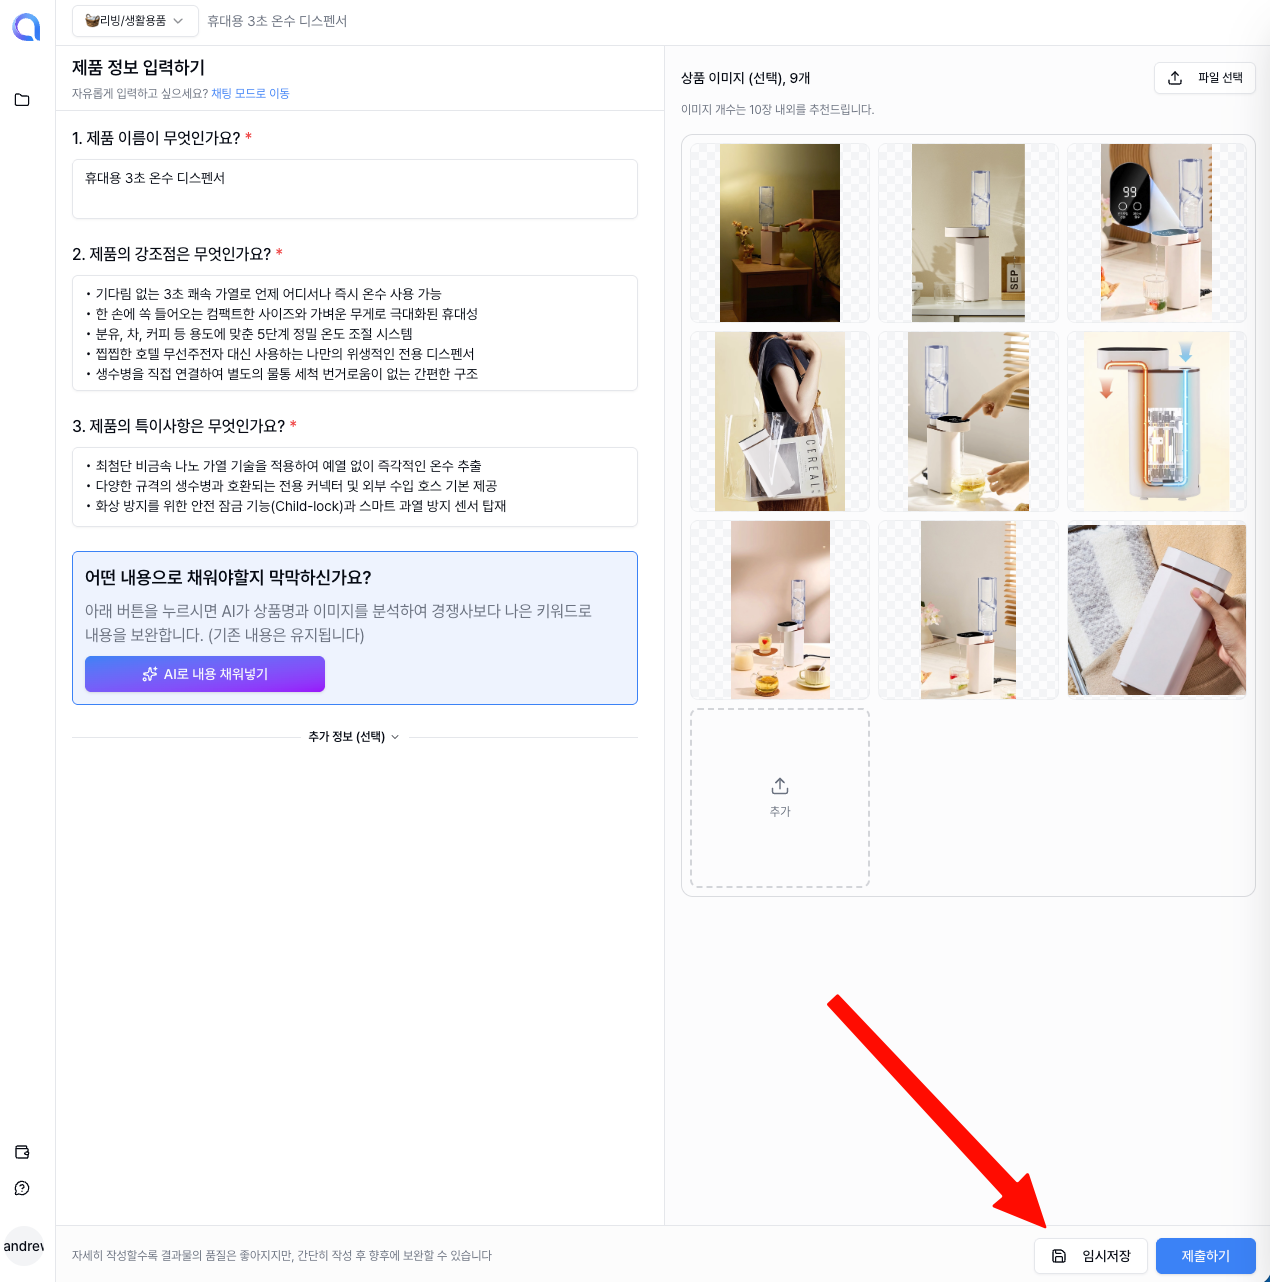
If you need to step away suddenly or want to continue working later, click the Save as Draft button.
Your work in progress will be saved as-is, so you can pick up right where you left off when you return.
Submit
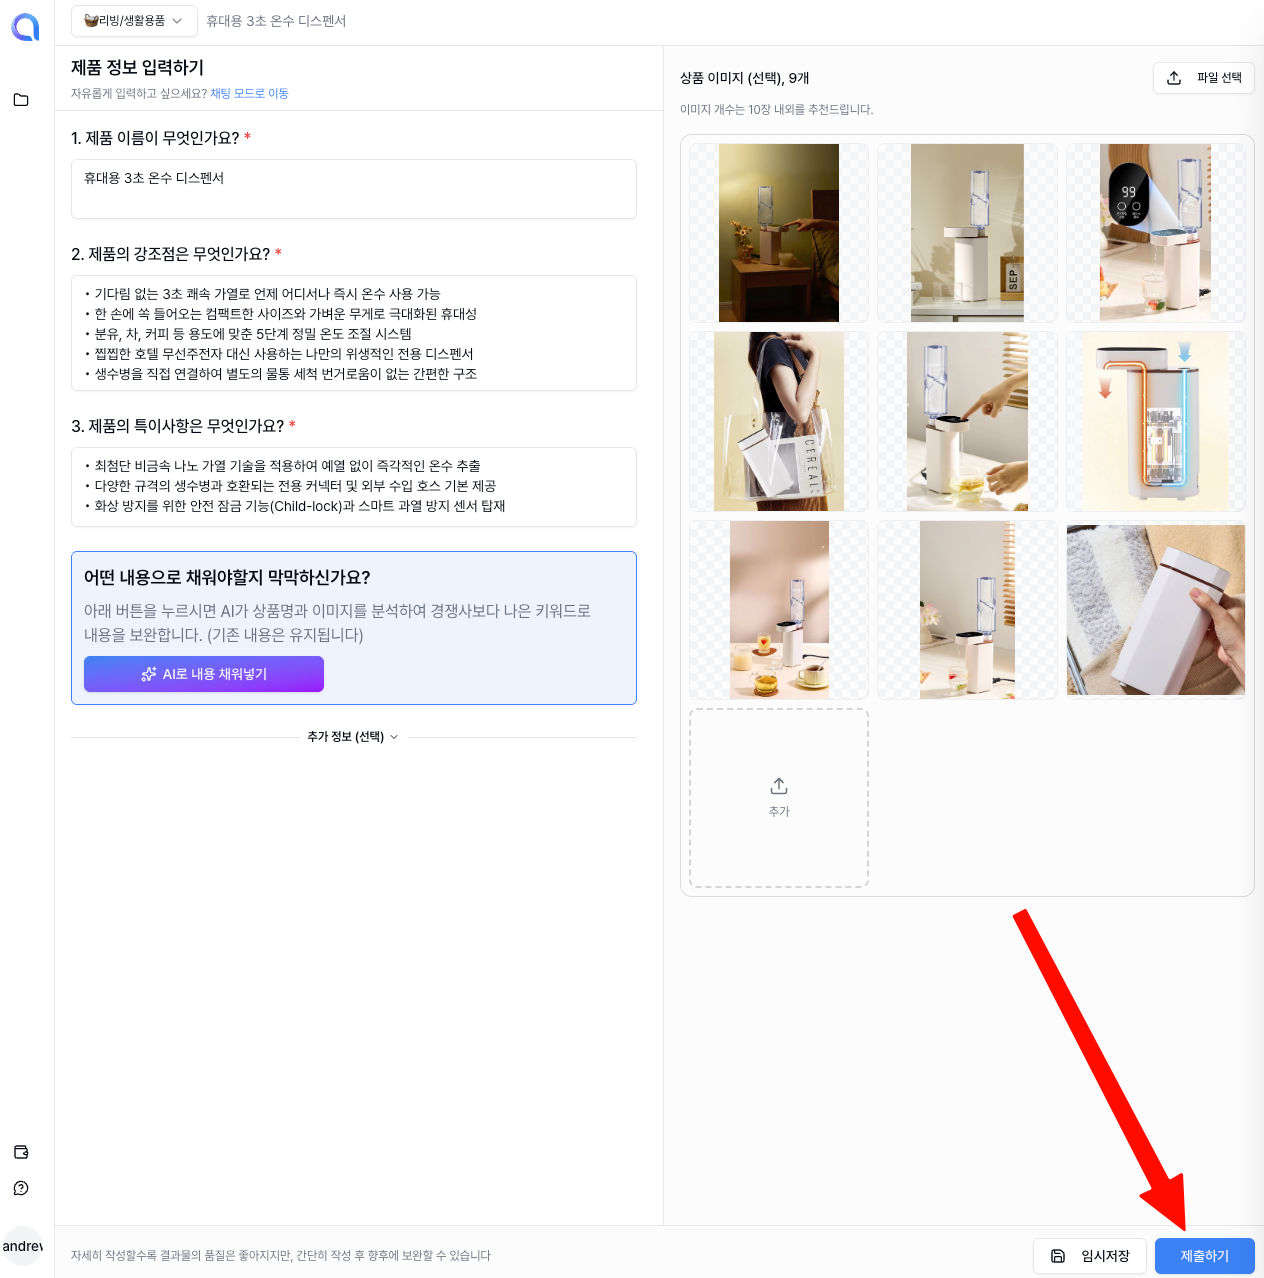
Once you've reviewed all the content in the plan, click the Submit button.
When you submit, the AI will start designing based on your plan.
It usually takes about 1–2 minutes, and you'll be able to see the results as soon as it's done.
Detail Page Creation Complete
Congratulations! 🎉 Your detail page has been created!
The AI has automatically completed a multi-section detail page for you.
You can use it as-is, or if you'd like to fine-tune it, you can edit it in the Studio.
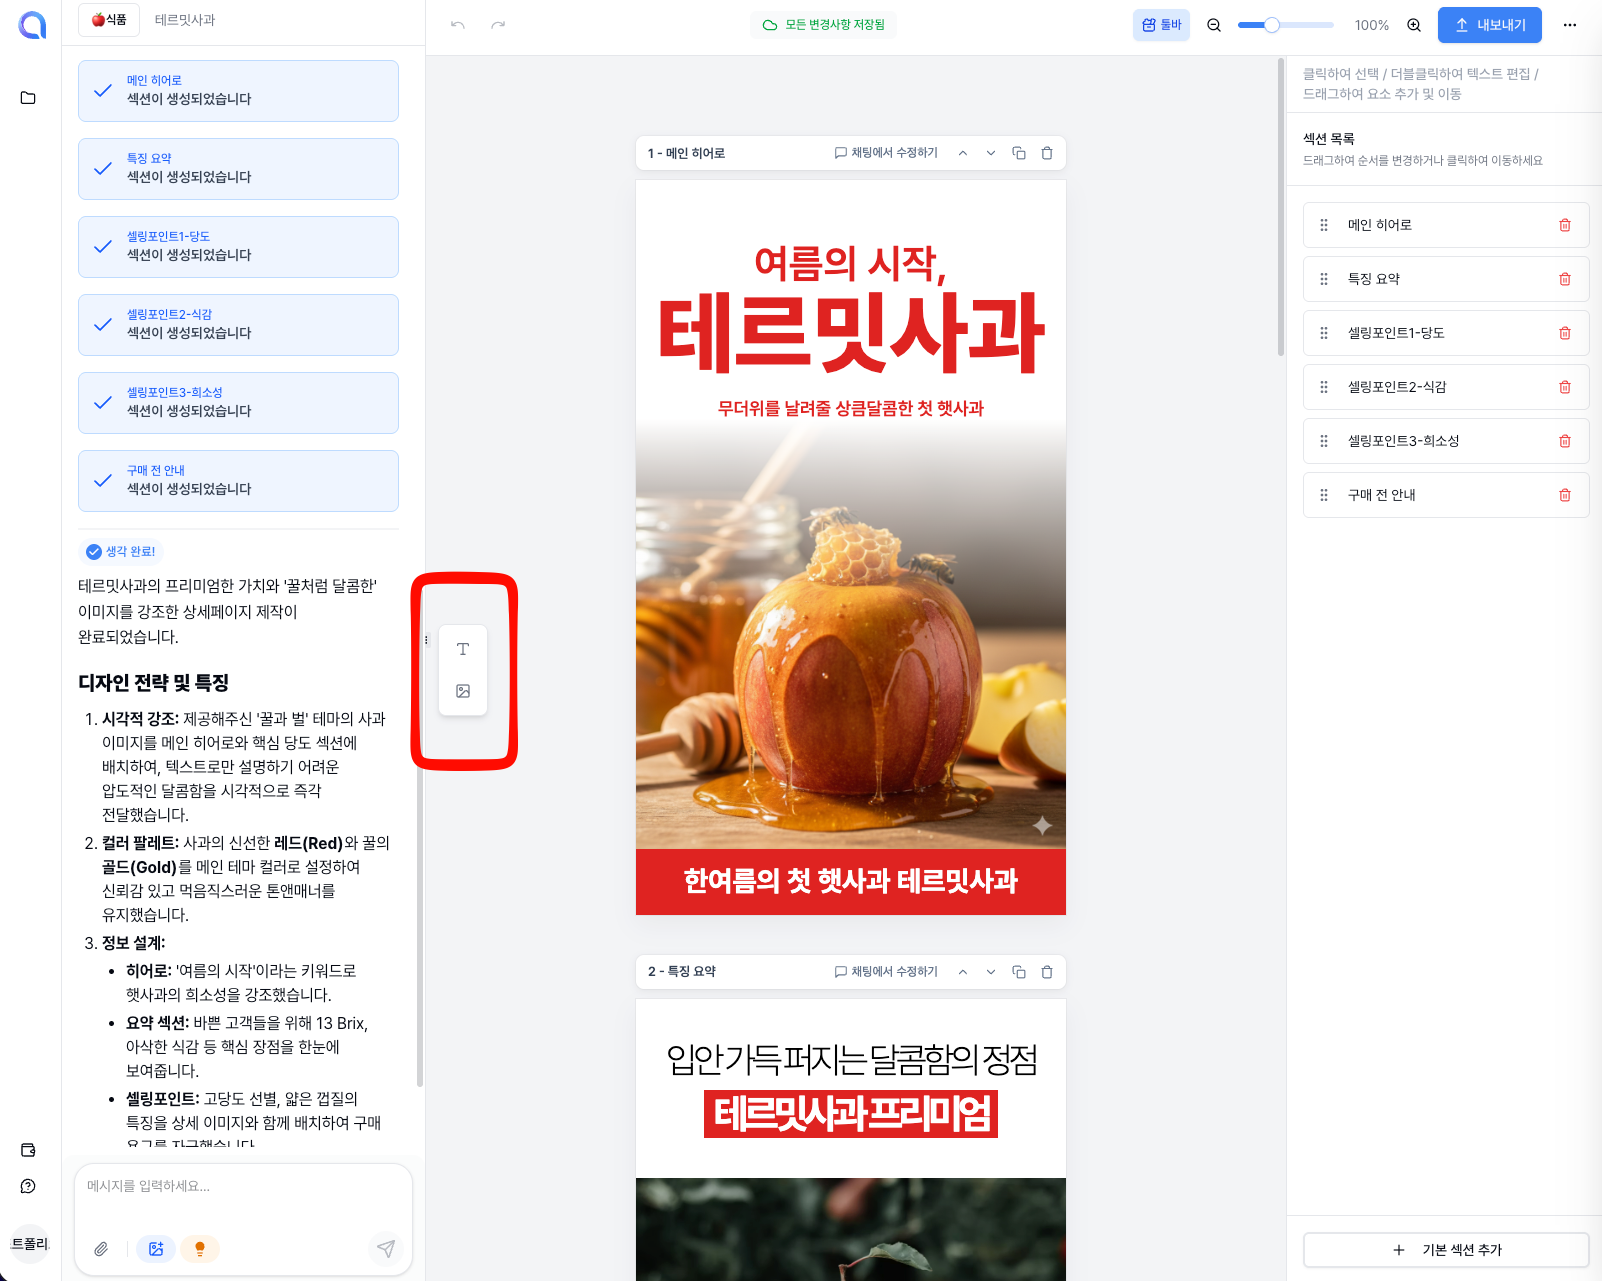
Using the Studio Page
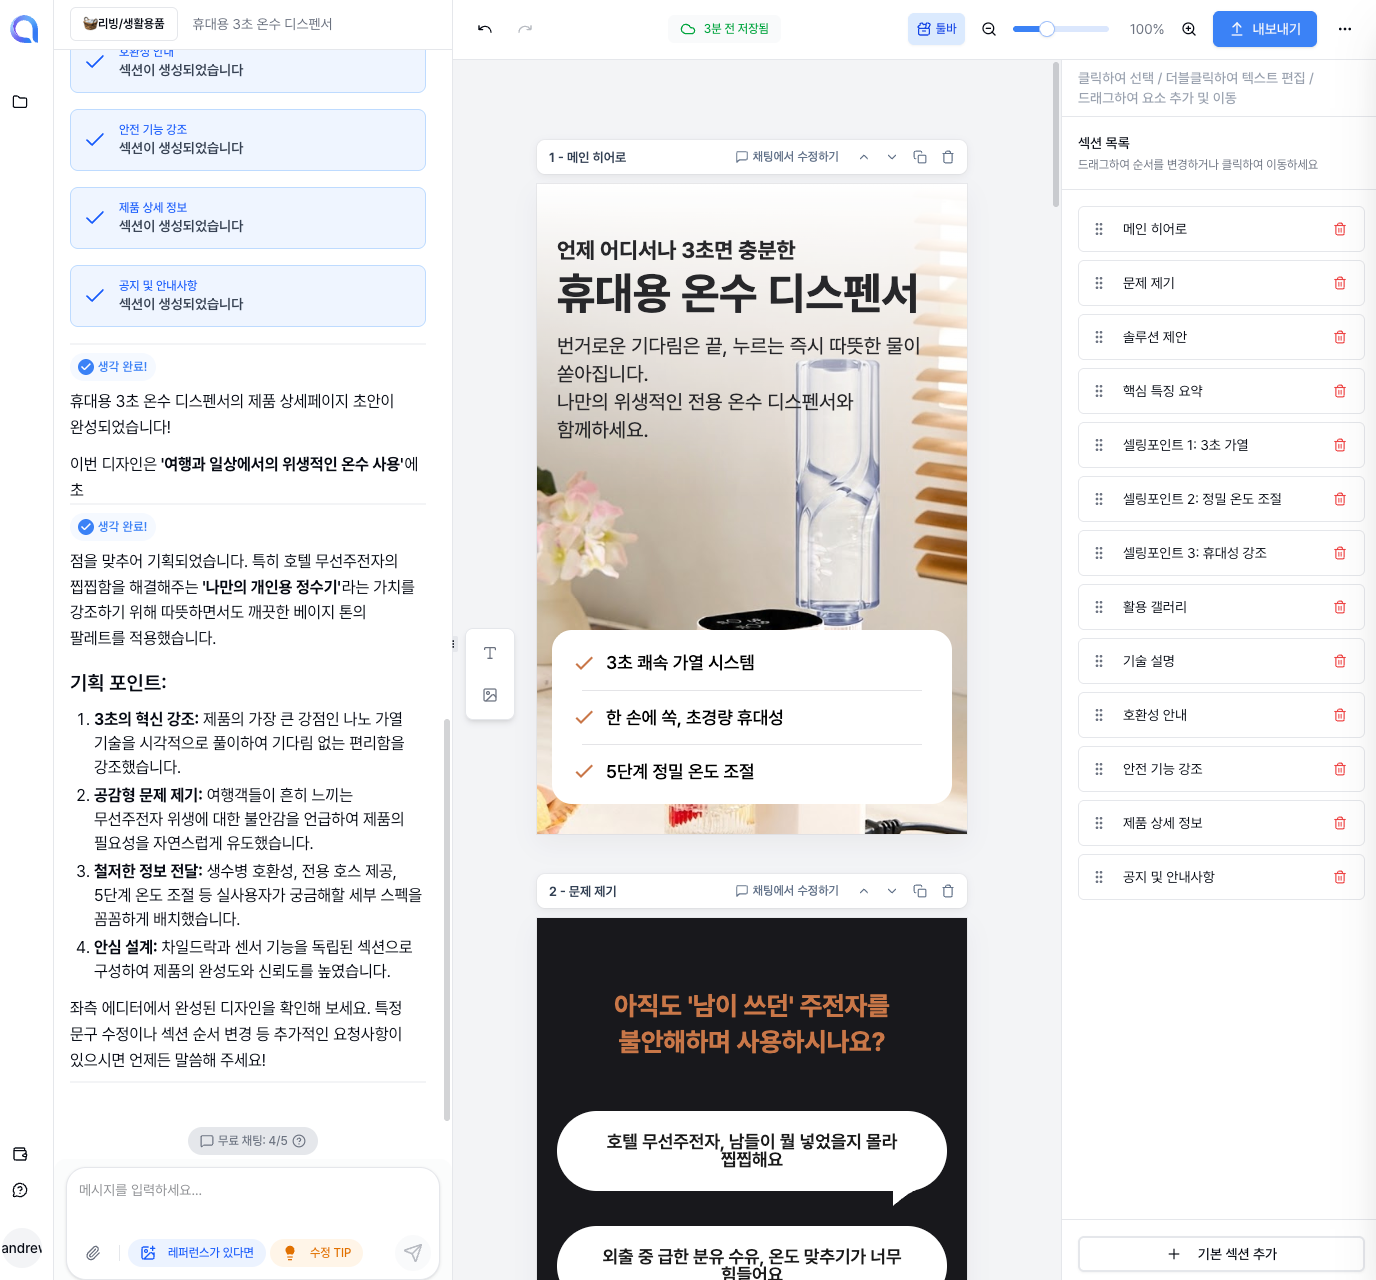
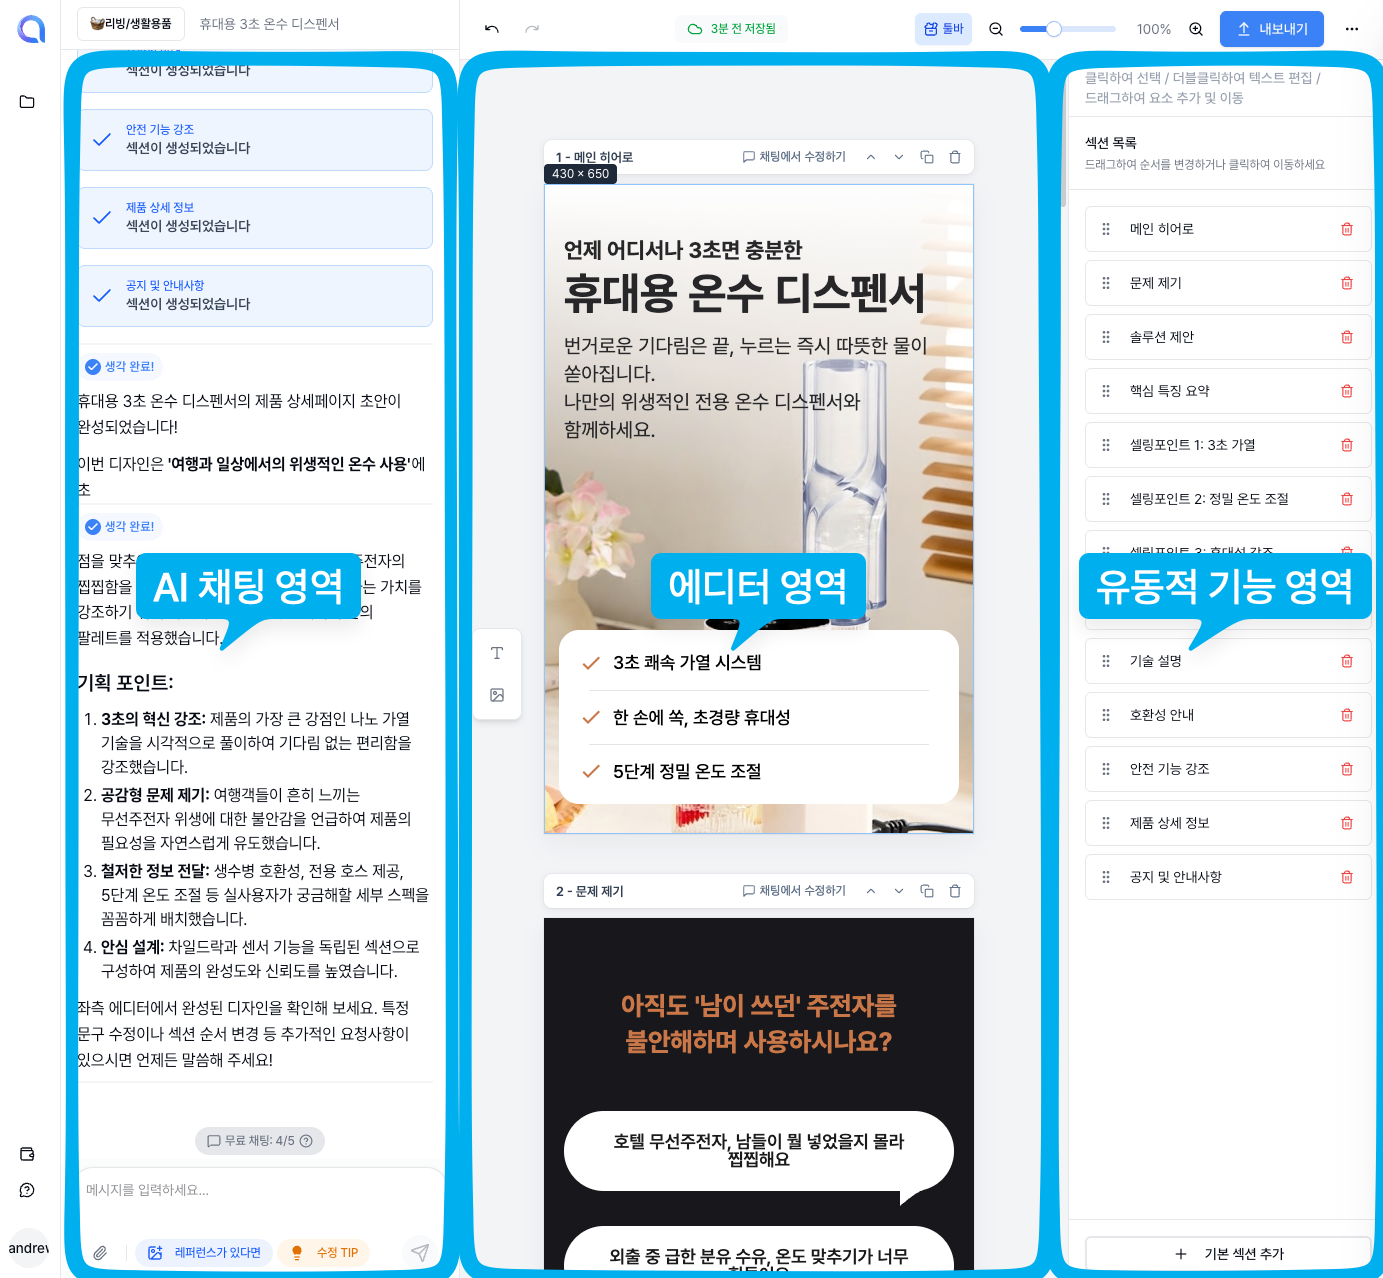
The Studio is the editing workspace where you can freely modify your detail page.
On the left, you'll find AI chat and tools; in the center, a preview of your detail page; and on the right, the detailed settings panel.
From this screen, you can perform all editing tasks such as modifying text, replacing images, and adding/removing sections.
We support both direct click-to-edit and AI chat-based editing, so use whichever method is more convenient for you.
Editing via AI Chat
Using the AI chat window on the left side of the Studio, you can request edits in natural language, just like talking to a designer.
For example, you can do things like:
- Add a section: "Add a reviews section"
- Edit a section: "Change the background color of the first section to blue"
- Delete a section: "Delete the last section"
- Generate an image: "Create a luxurious-looking background image"
AI editing is completely free from template constraints, so you can make detailed adjustments however you like.
Using References
When it's hard to describe what you want in words, try using reference images.
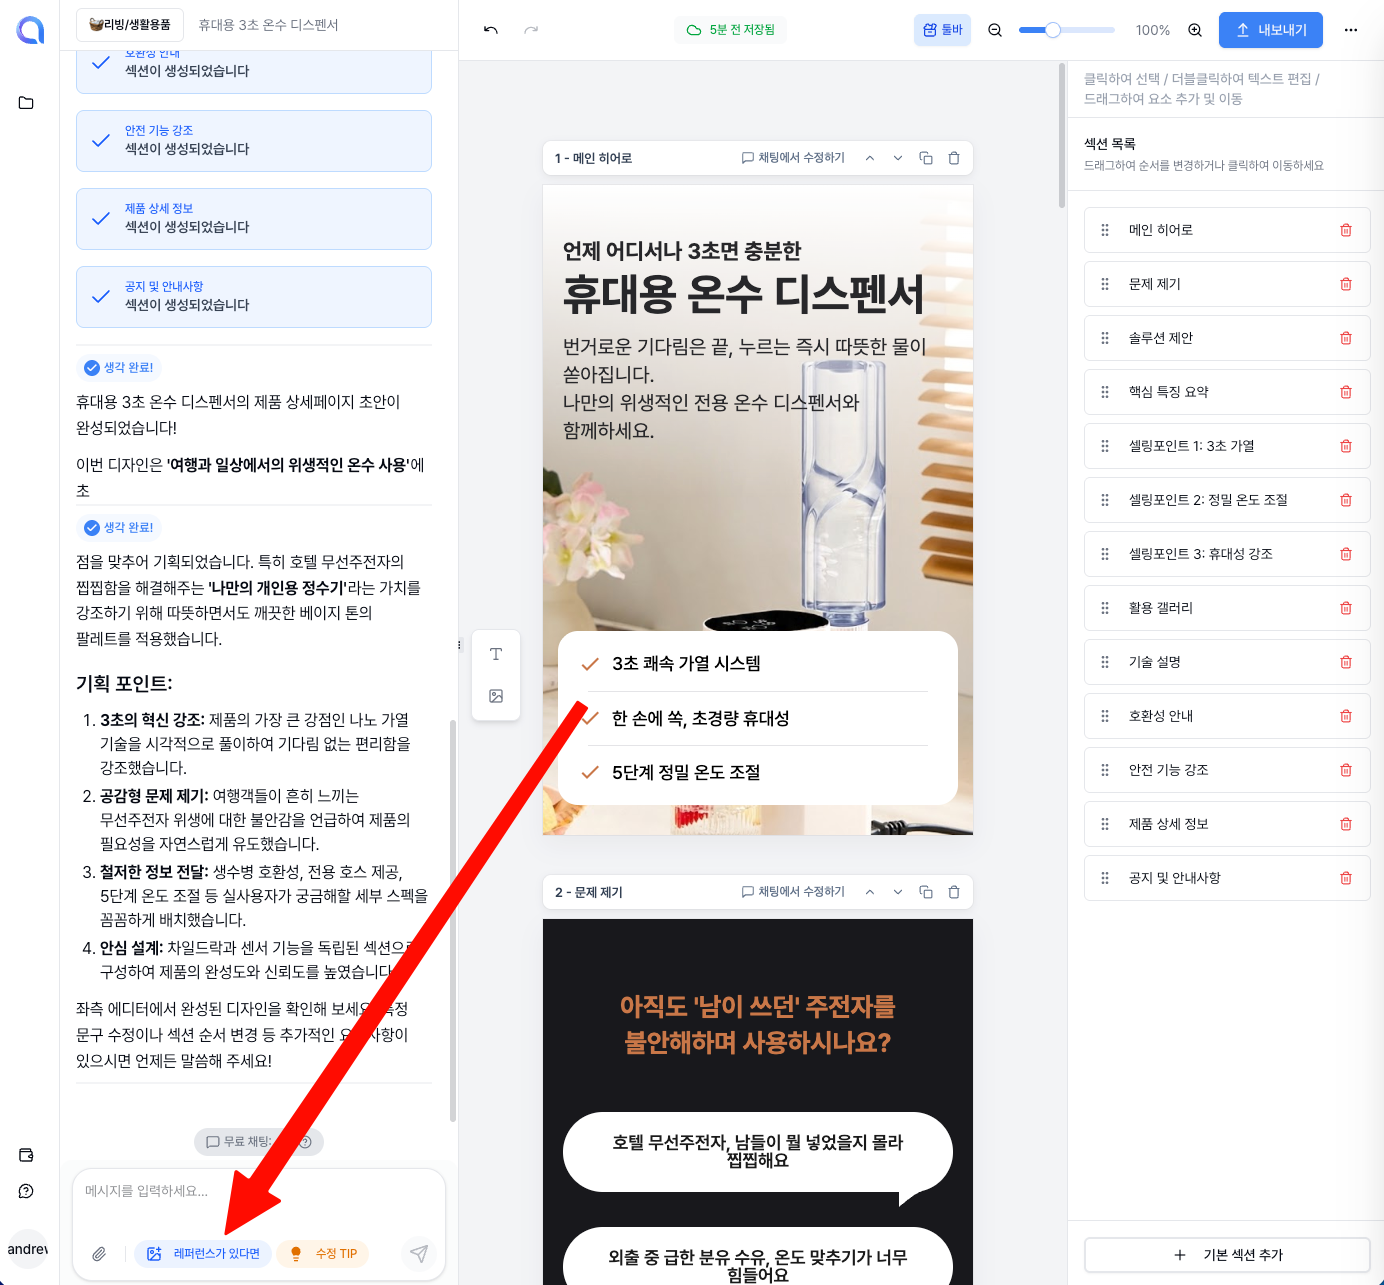
You can attach reference images in the chat window. Simply upload another detail page or design image that you like.

Select your reference like this, and if you also mention which aspects to reference, you'll get even more accurate results.
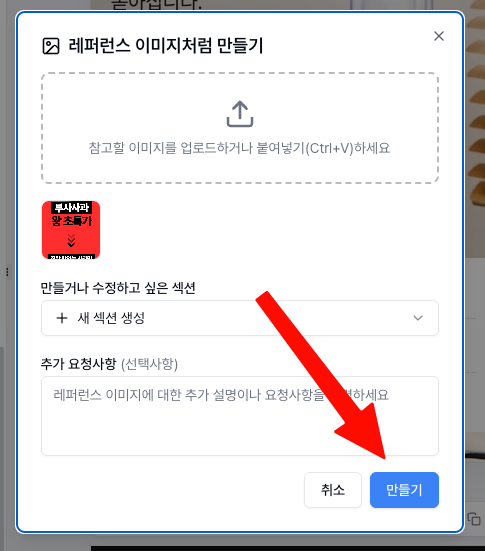
The AI analyzes the style and atmosphere of the reference and modifies the design to match that feel.
This is a really useful feature when you want to reference a competitor's or a famous brand's detail page!
⭐ Adding Elements with Drag and Drop
Without any coding or complex operations, you can add text or images simply by grabbing an element from the left toolbar and dropping it wherever you want.
Grab the Text button or Image button from the left toolbar with your mouse and drag it to the desired location.
As you can see in the GIF above, it's really intuitive!
Just drop the element right where you want it, and it's added instantly.
It's as easy as inserting shapes in PowerPoint!
⭐ Moving Elements with Drag and Drop
When you want to change the position of text or images that are already placed, you can easily move them with drag and drop as well.
Click the element you want to move, then drag it to freely reposition it wherever you like.
This is a very convenient feature for fine-tuning your layout.
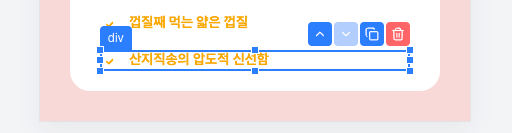
Duplicate / Delete Elements
When you select an element, the following action menu appears.

From here, you can perform the following actions:
- Move: Reposition the element to another location
- Duplicate: Create an identical copy of the element (useful when you need multiple text or image elements with the same style)
- Delete: Remove an unwanted element
- Resize: Make the element larger or smaller
Keyboard shortcuts are also supported for faster editing:
- Ctrl+C: Copy the selected element
- Ctrl+V: Paste the copied element
By dragging the corners or edges of an element, you can freely resize it like this. You can expand text areas, enlarge images, and more.
Duplicated elements are created right next to the original and can be edited independently.
When you need to repeat similar layouts, simply duplicate and change the content instead of creating everything from scratch.
Editing Text
To edit text, double-click on the text you want to modify.

Double-clicking switches to text editing mode, allowing you to freely modify the content as you wish.
Whether it's fixing typos, changing phrases, or adding descriptions—any edit can be made instantly.
⭐ Section Toolbar Features
Each section has a section toolbar above it.
Through this toolbar, you can perform various editing tasks at the section level.
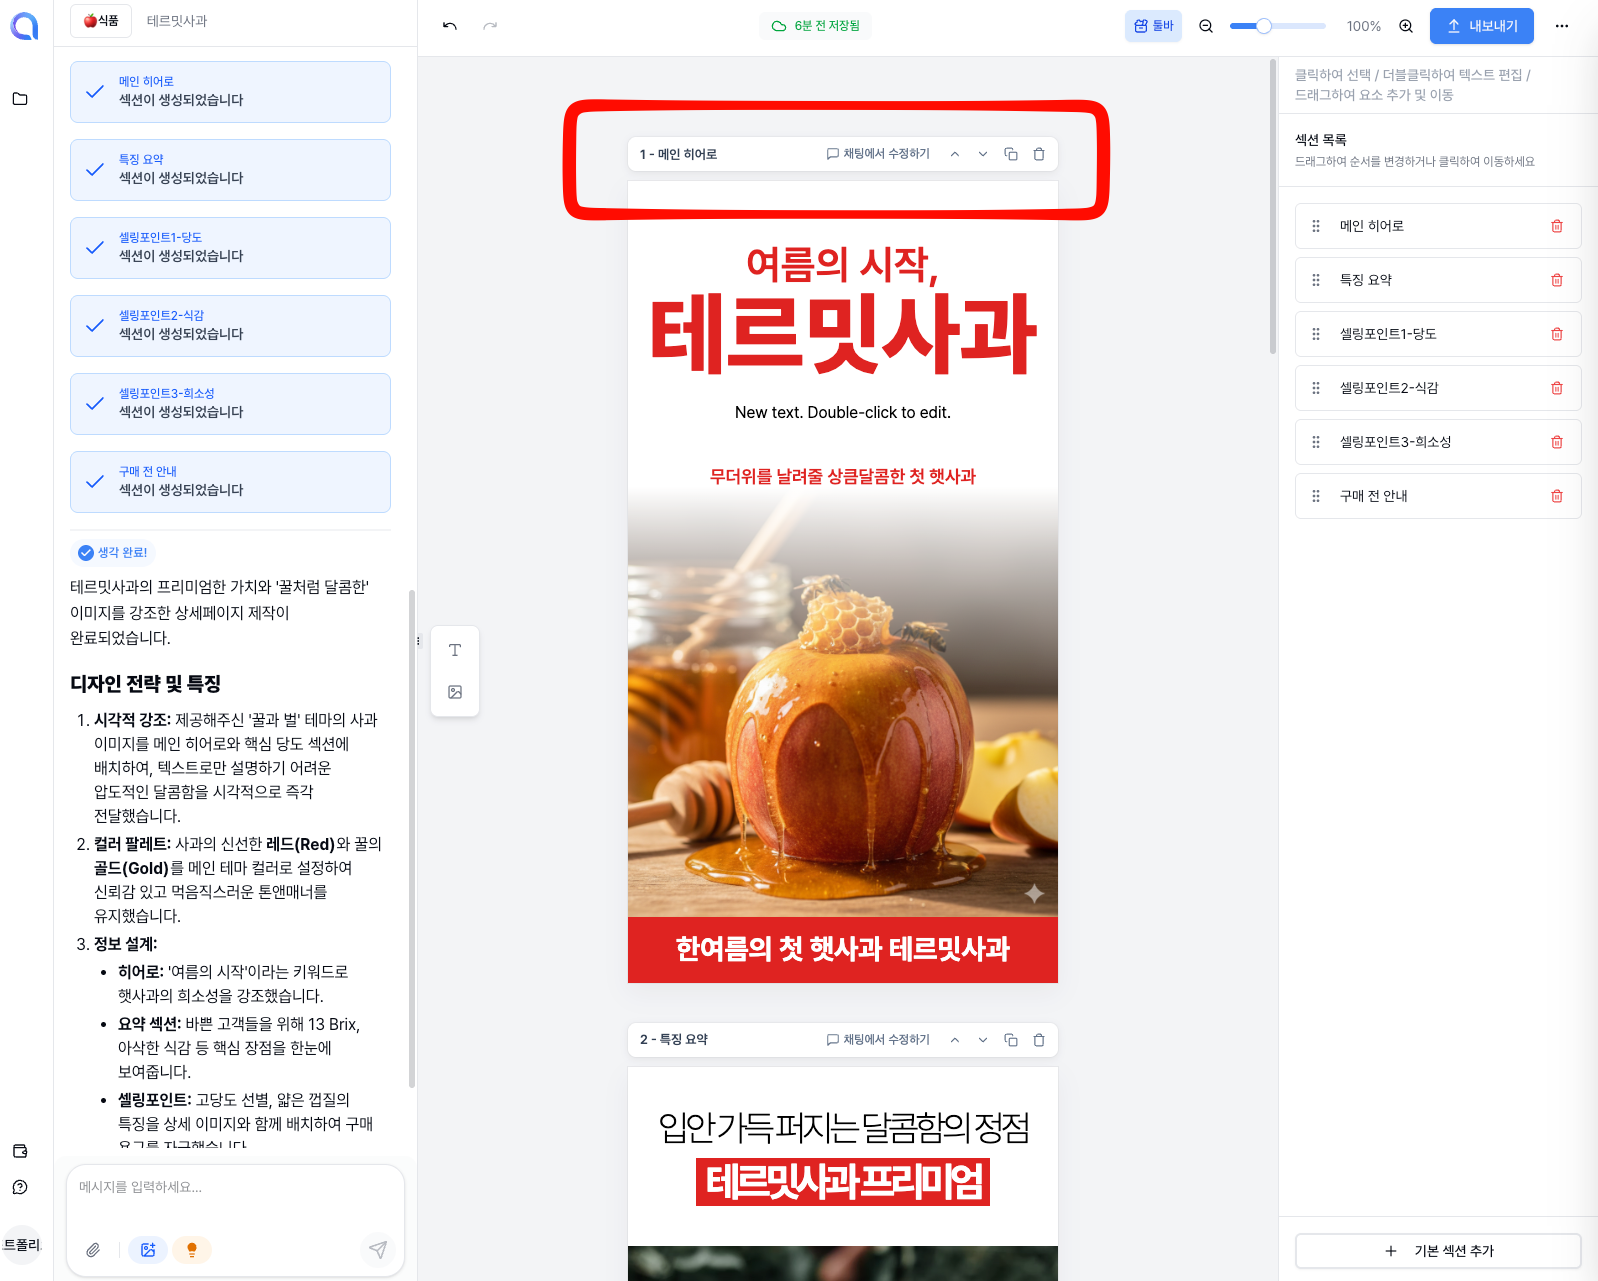
The toolbar includes features such as editing section titles, AI chat editing, reordering, duplicating, and deleting. Let's go through each one.
Edit Section Title
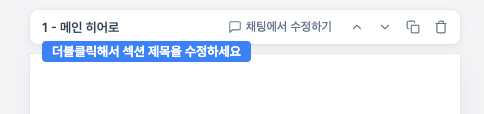
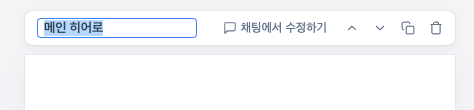
Double-click on the section title to switch to editing mode.
While section titles aren't directly displayed on the product detail page, they help you quickly identify each section when managing multiple sections.
Renaming them to descriptive names like "Product Introduction," "Customer Reviews," or "Shipping Info" makes editing much more convenient.
Edit via Chat
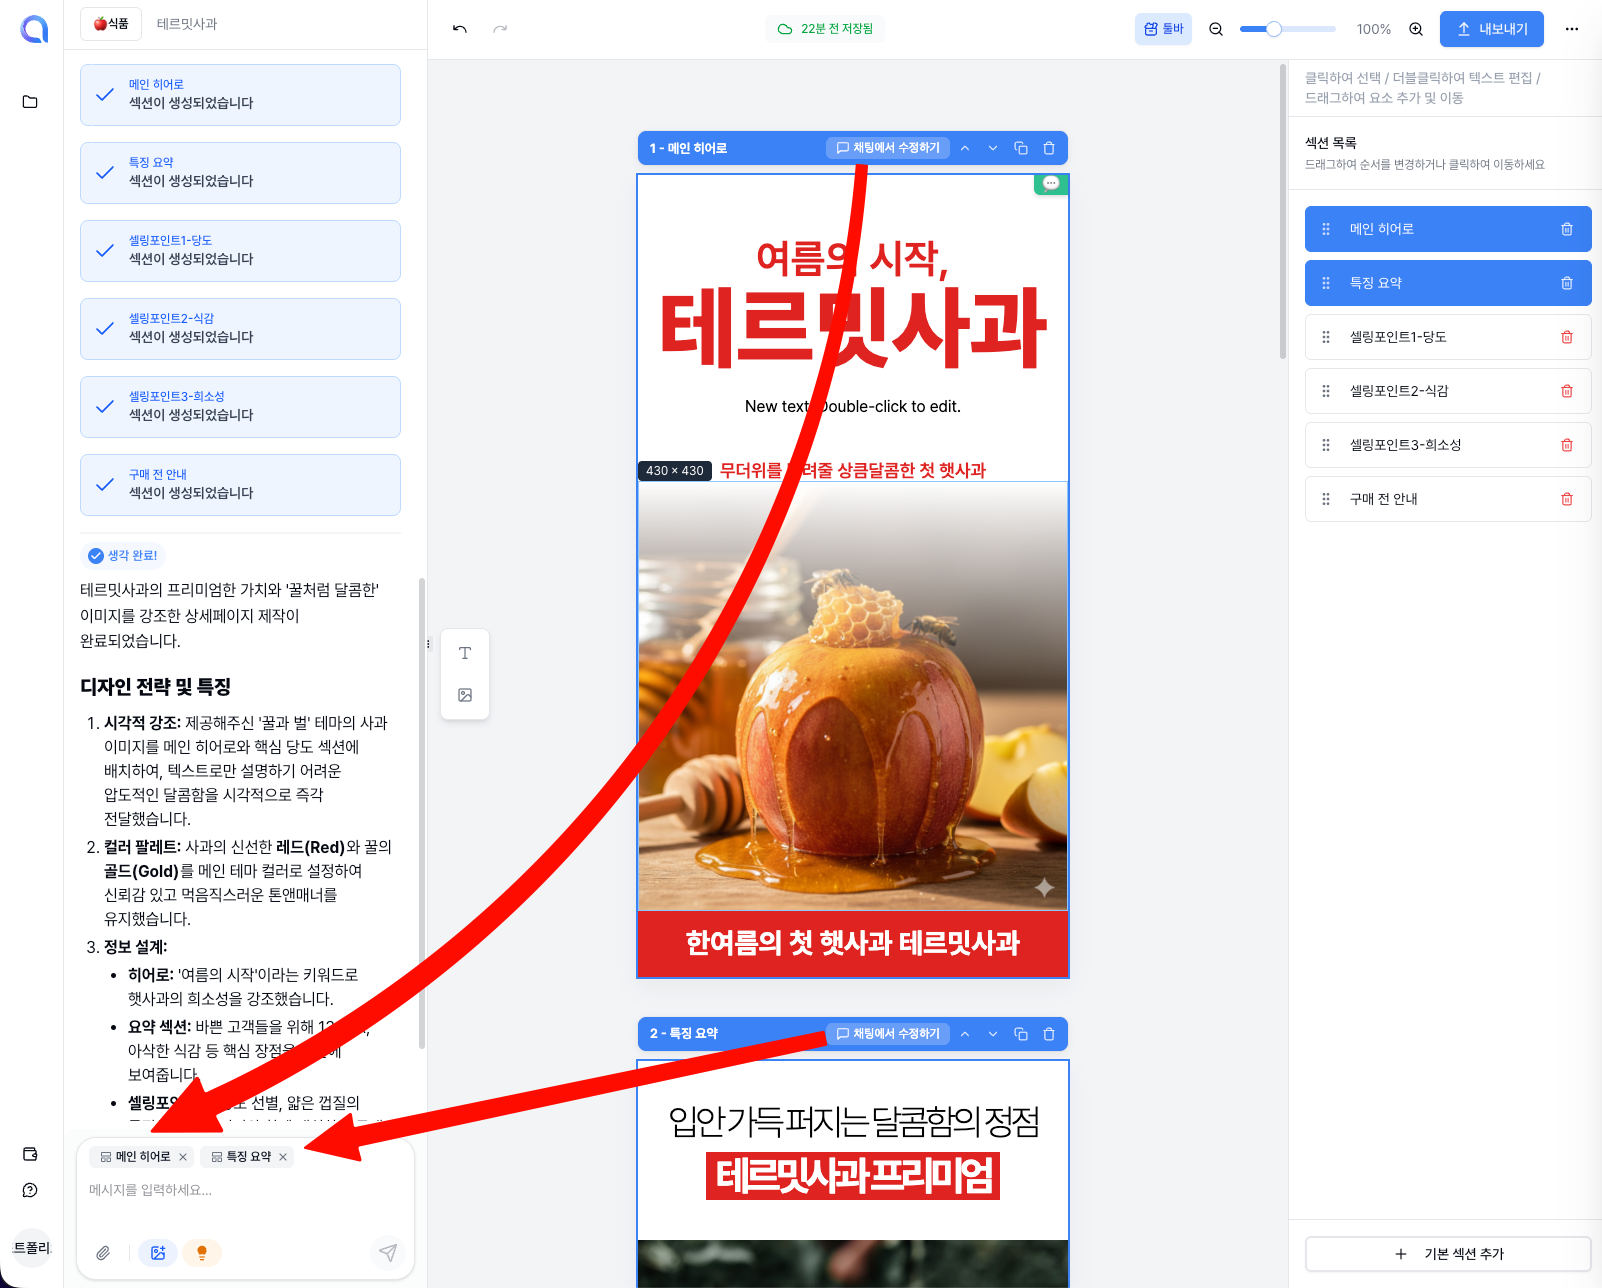
When you want to focus on editing a specific section, select that section and then send an edit request through AI chat.
Simply type in natural requests like "Change this section's background to white," "Make the text bigger," or "Move the image to the left," and the AI will precisely edit only that section.
As shown in the GIF above, you can see the AI modifying the design in real time based on your chat requests.
Even complex changes that would be tedious to do manually can be handled with a single chat message—super convenient!
Reorder Sections

When you want to change the order of sections, use the reorder buttons (arrows) in the toolbar.
Click the up/down arrows to move a section one position up or down.
For example, if you want to move the Reviews section right below the Product Introduction, just click the up arrow a few times.
Duplicate Section

If there's a section you like, click the Duplicate button to create an identical copy.
The duplicated section is added right below the original. Just change the content to quickly create sections with similar layouts.
For example, you can duplicate a "Color Options" section and easily create individual sections for each color.
Delete Section
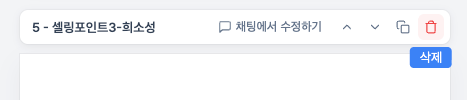
Remove unnecessary sections cleanly with the Delete button.
If any AI-generated sections don't fit your product, feel free to delete them and keep only the sections you need.
However, please be careful as deleted sections may be difficult to recover!
Hide Toolbar
If you wish the editing area were a bit wider, you can hide the toolbar.
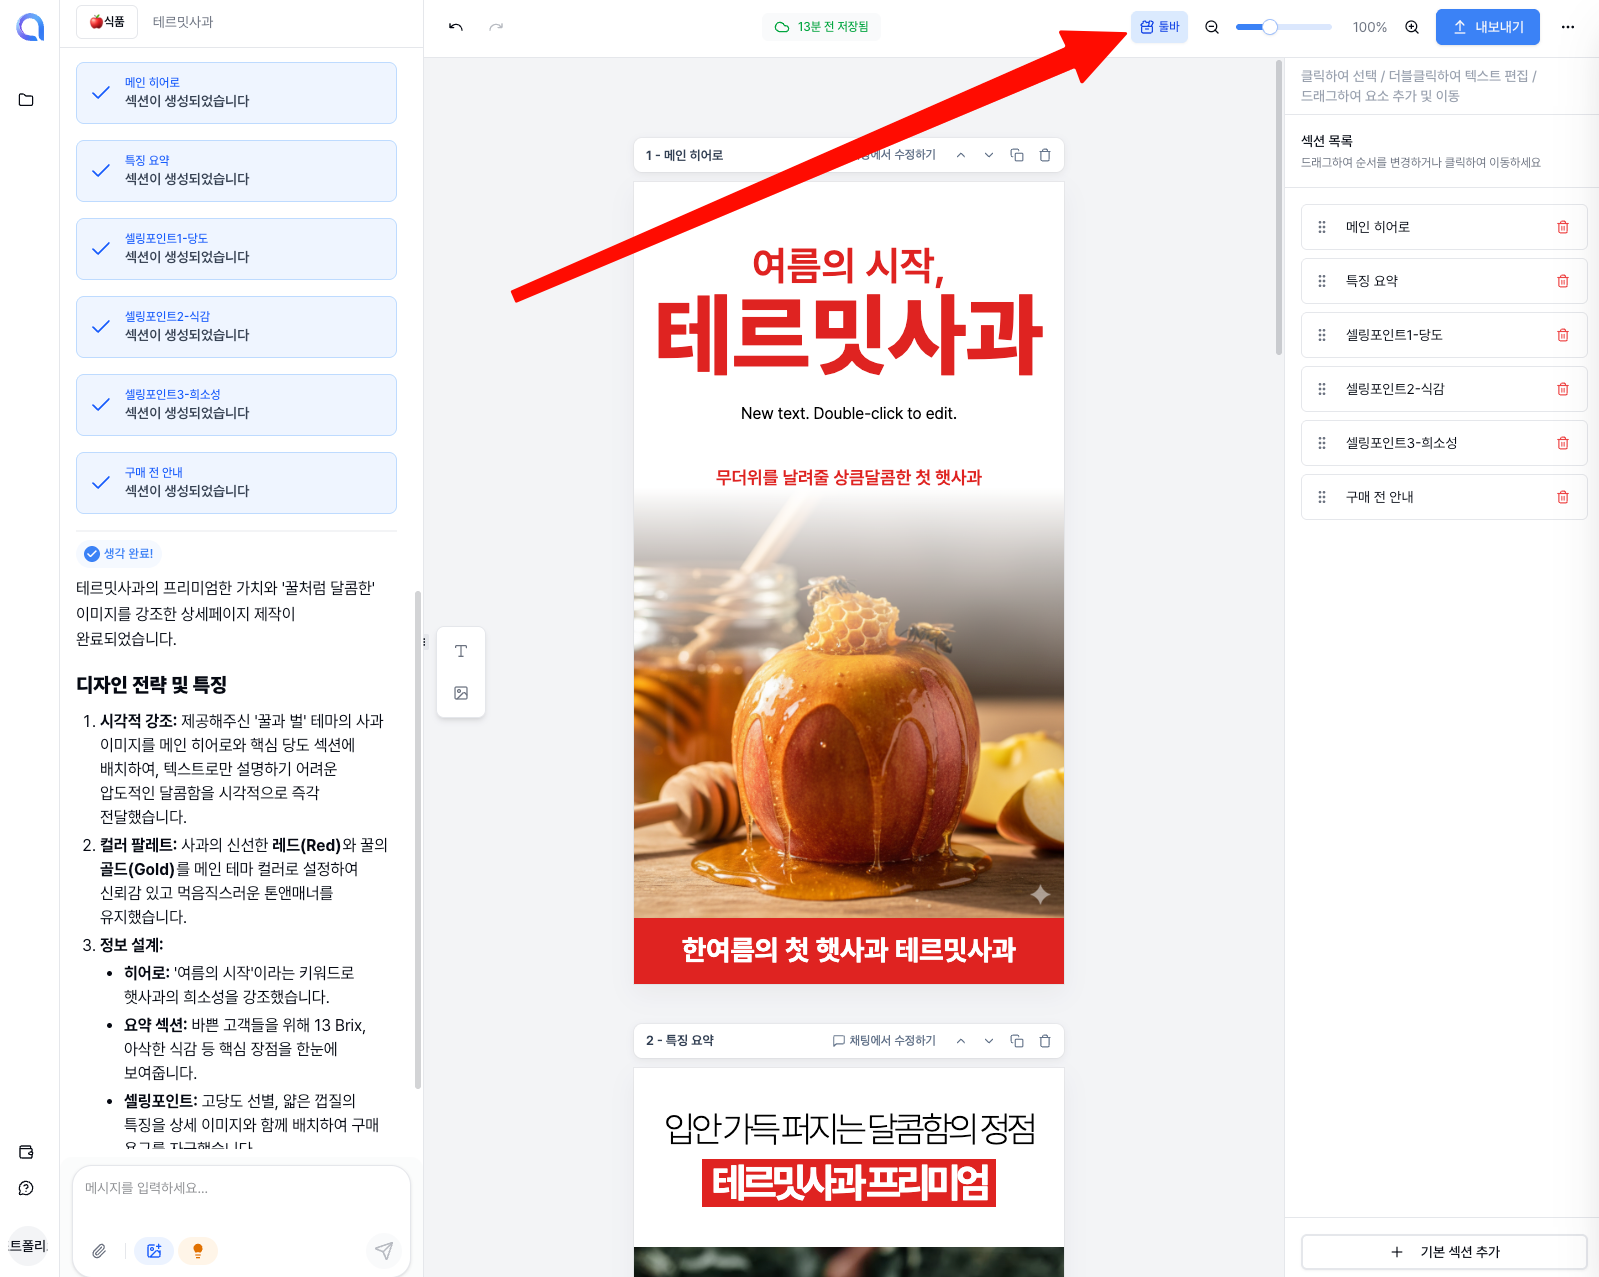
Click the hide toolbar button on the left side of the screen to collapse the toolbar and expand the preview area.
As shown in the GIF above, you can toggle the toolbar open and closed depending on the situation.
Hide the toolbar when you want to see the overall finished look, and expand it again when you need to make edits.
Right Panel
The panel on the right side of the Studio provides section management, photo editing, AI image generation, text style editing, and other detailed editing features.
Section List
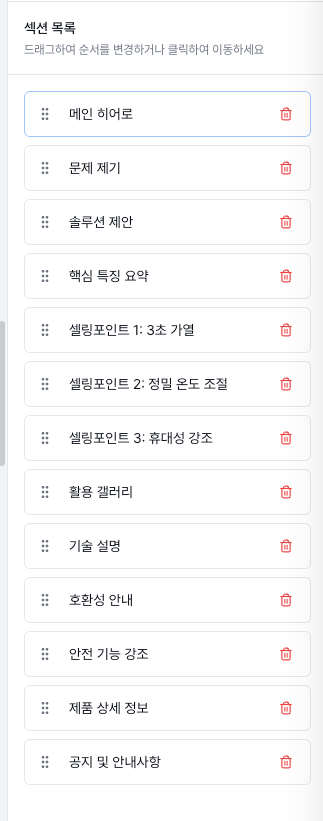
The Section List in the right panel lets you see all sections in your current detail page at a glance.
Click on a specific section here to jump directly to it, making it easy to quickly navigate when you have many sections.
Photo Editing
If you'd like to touch up the photos on your detail page, try the Photo Editing feature.
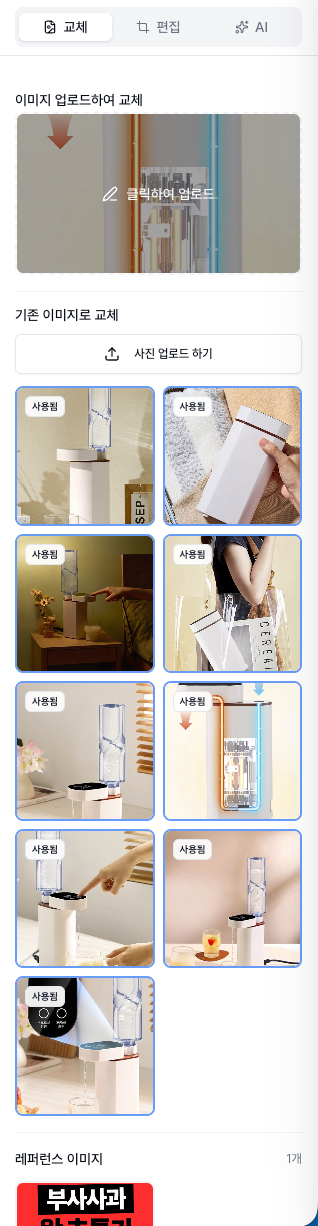
Select an image, and photo editing options will appear in the right panel. Here you can replace the image.
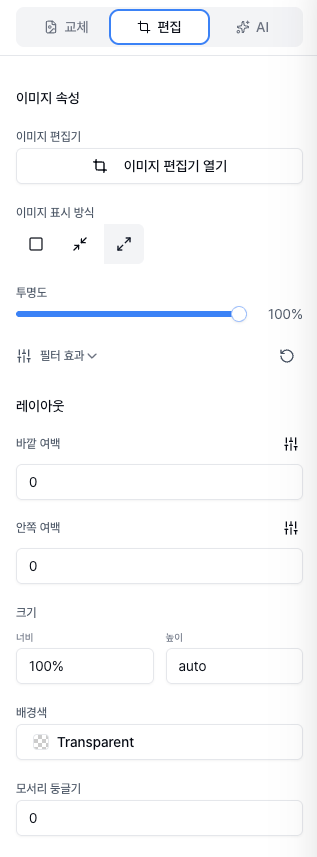
You can adjust the display area of the image. Frame it so the key parts of your product are clearly visible.
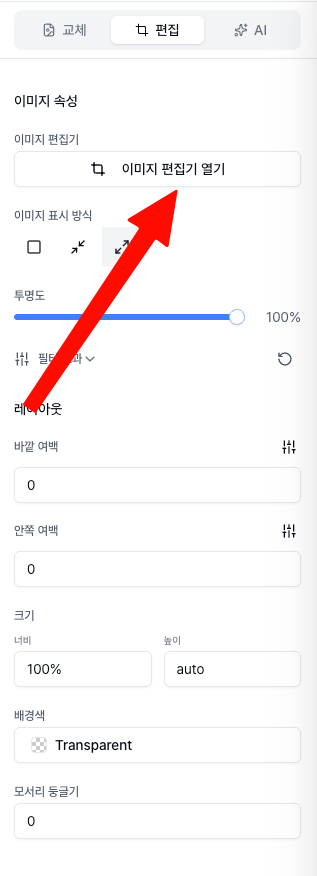
Using the crop tool, you can cut out only the area you want from a photo. This is useful for removing unnecessary backgrounds or showing your product larger.
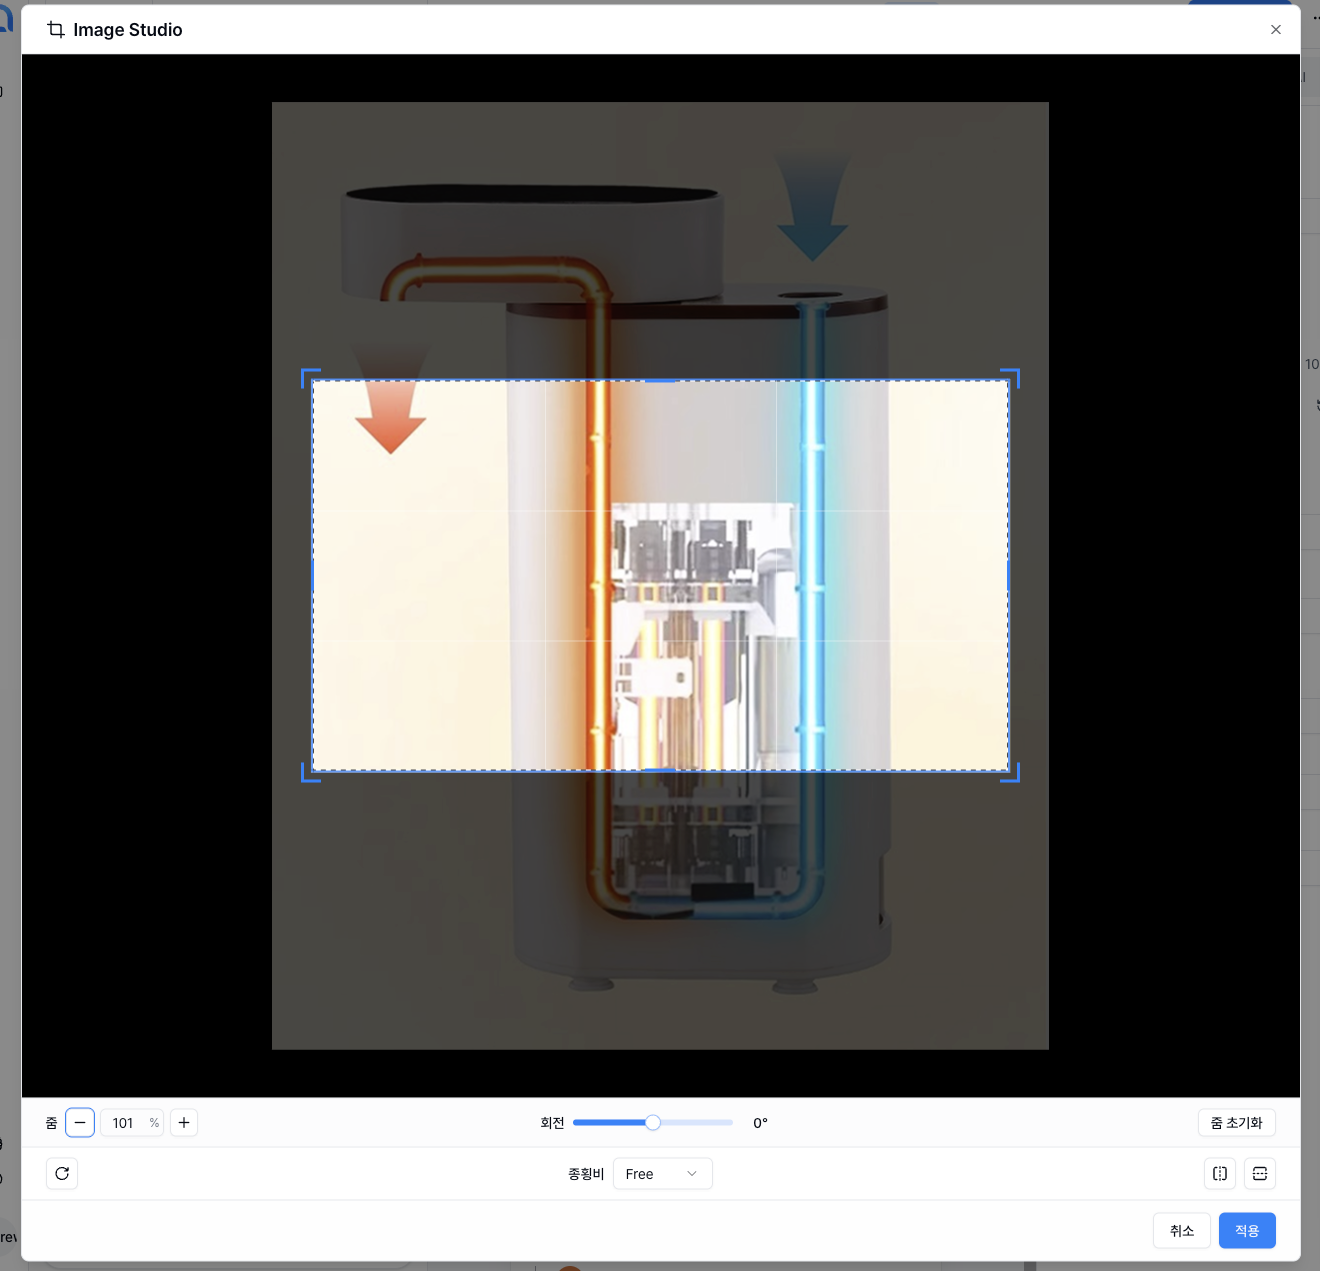
When editing is complete, click the Apply button to save your changes.
You can do simple photo edits right within Creazy without needing a separate image editing program.
AI Image
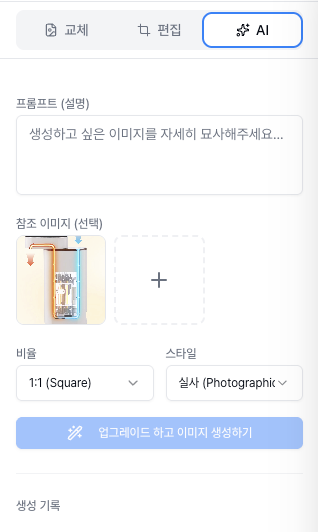
When you need background images or mood images beyond your product photos, try the AI Image generation feature.
Describe the image you want in text, and the AI will create a custom image for you.
For example, you can request "a warm wooden table background" or "a clean white marble background."
Text Style
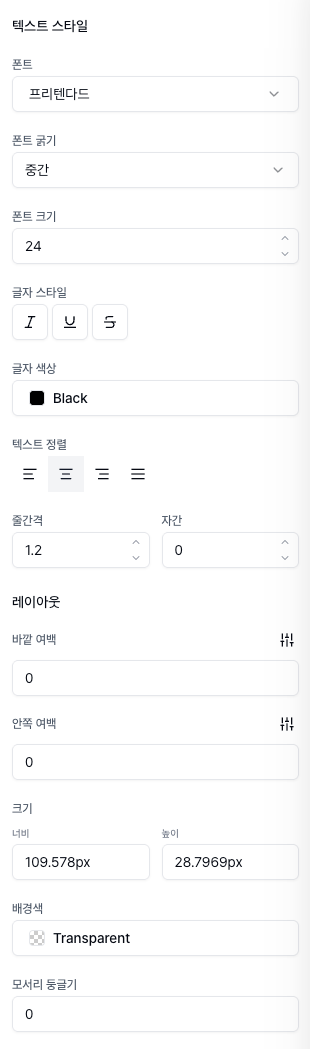
Select any text to fine-tune its style in the right panel.
You can freely change the font, size, color, weight, alignment, and more.
Style your text to match your brand's tone and manner.
Export
Once all your edits are complete, you can apply your detail page to your actual online store through Export.
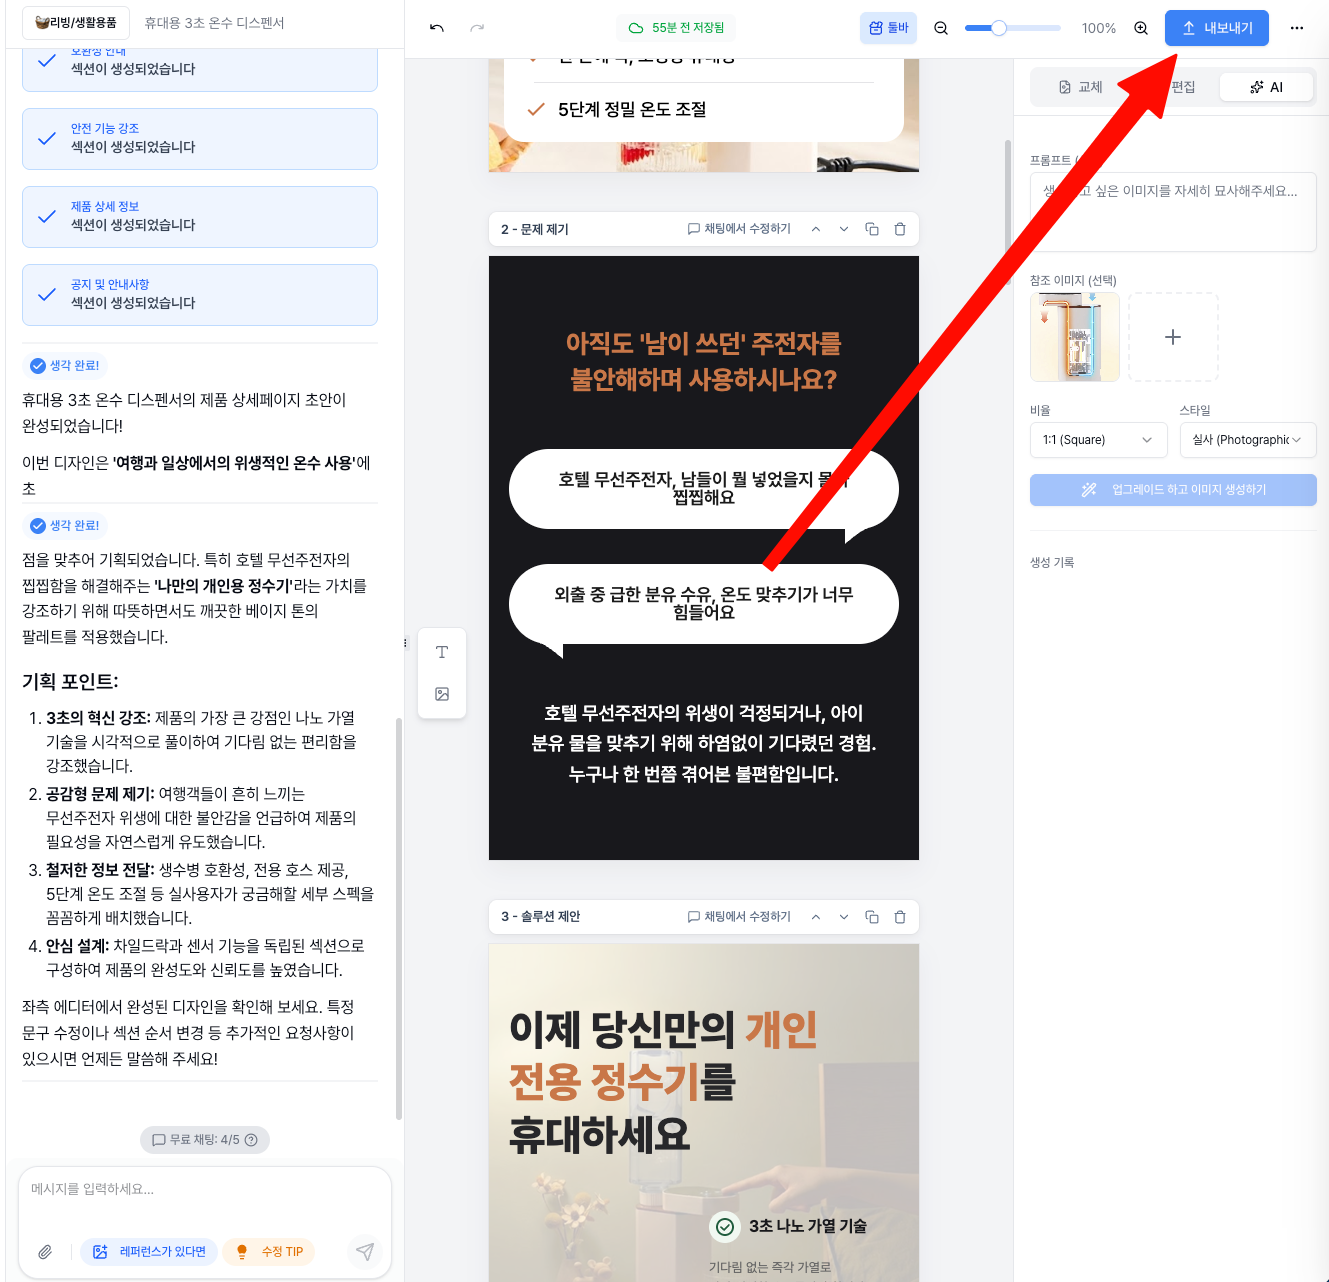
Click the Export button at the top of the screen.
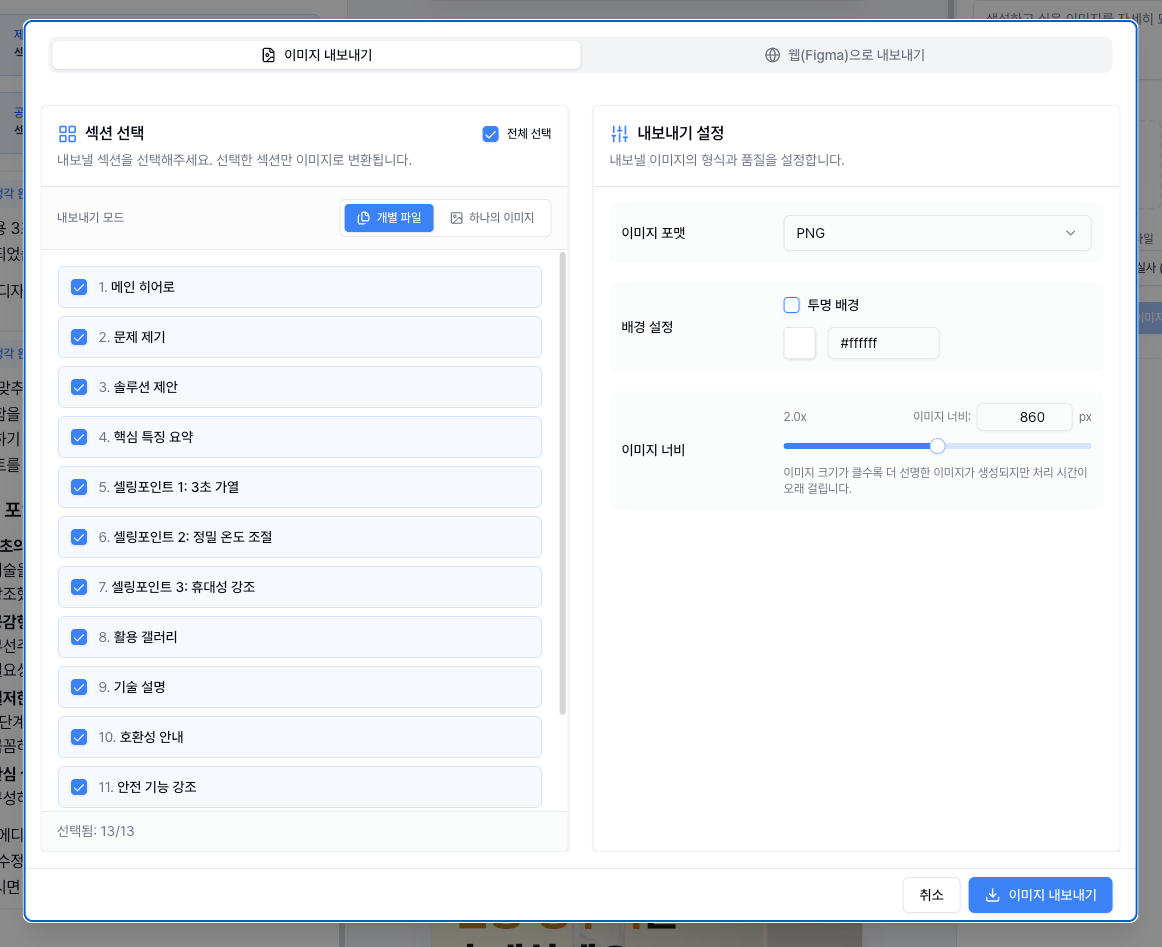
Choose Export Method
You can choose your export method. Creazy supports two options: Image and Web Deployment (Figma).
- Image Export: Downloads your detail page as image files. You can directly upload and use the images on most online stores like Naver SmartStore, Coupang, etc.
- Web Export: Provides a deployed link. You can embed it directly in your own website or platforms like Cafe24, I'mweb, etc.
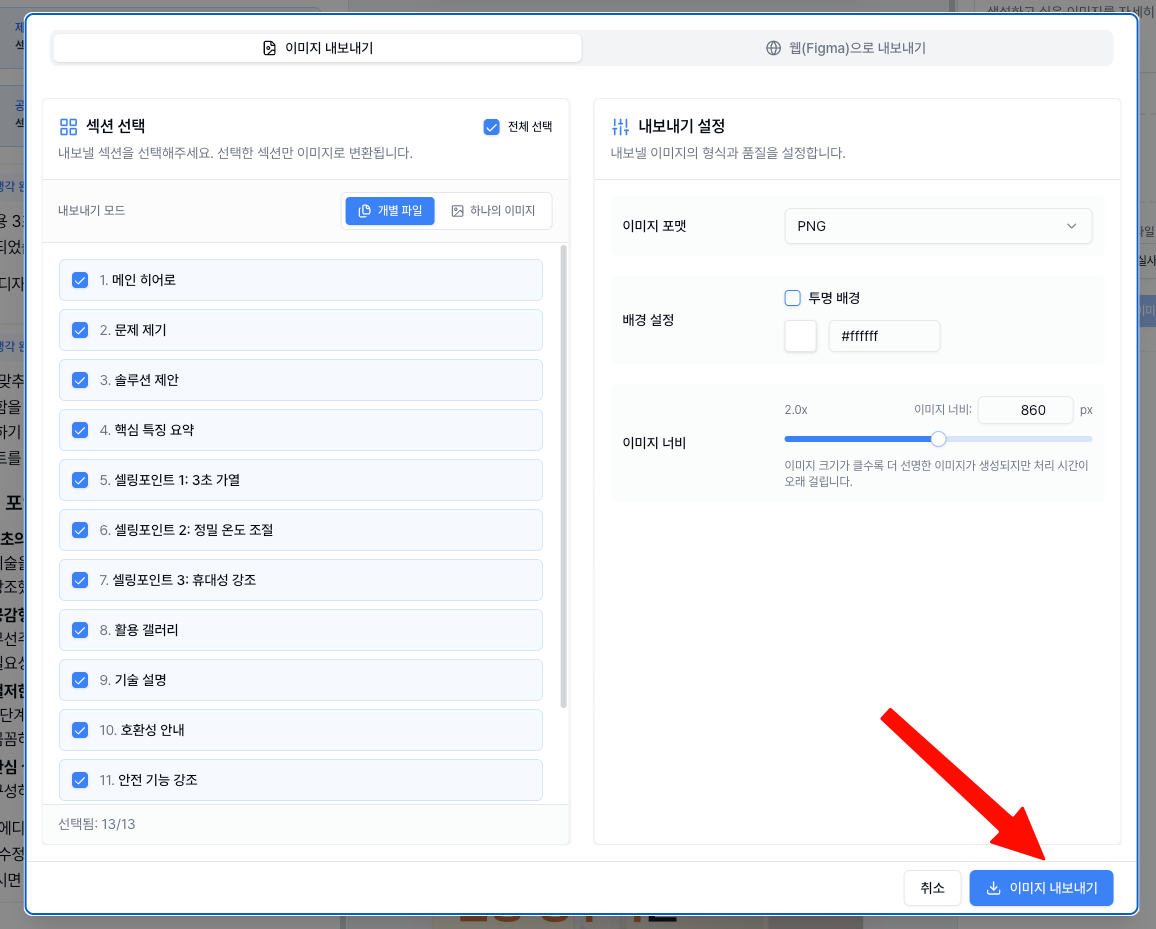
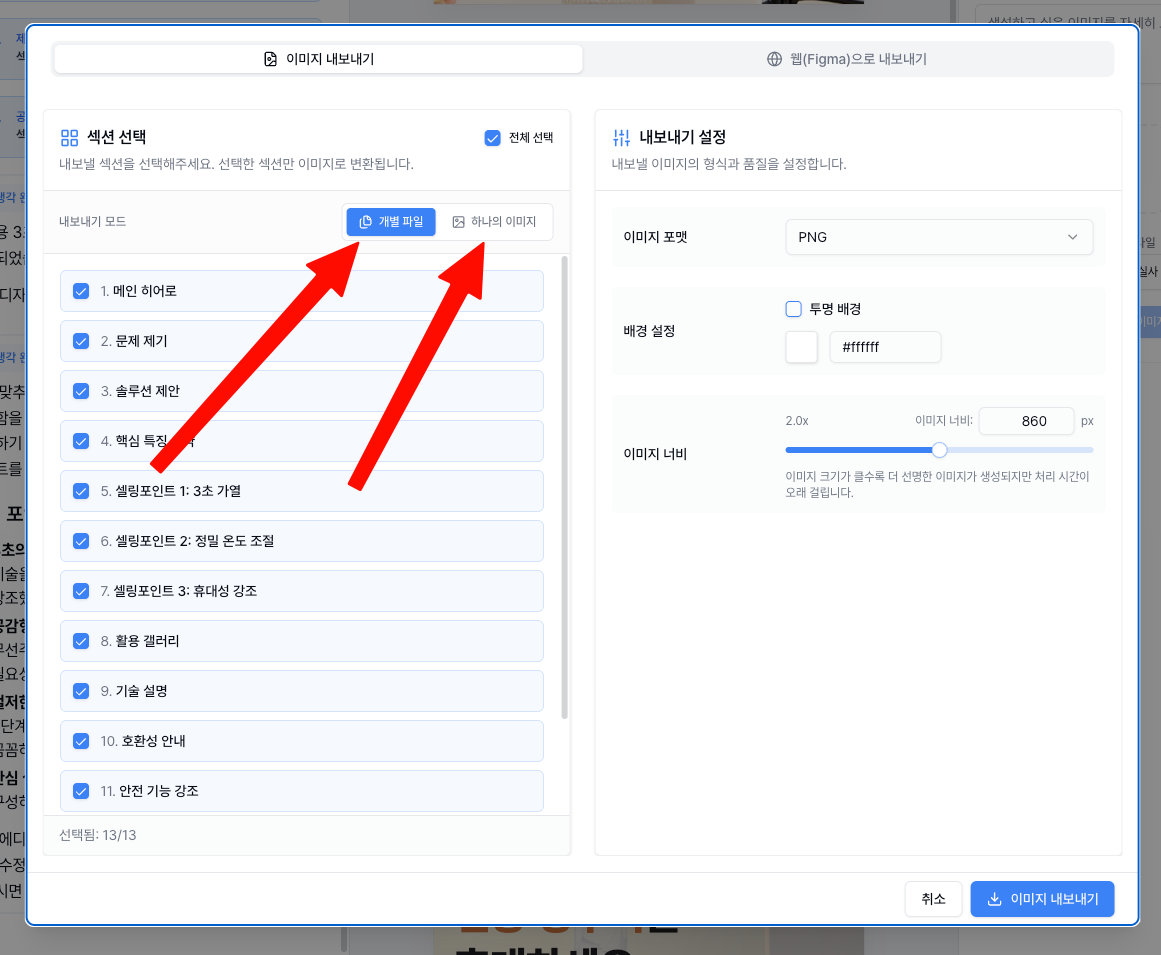
For image export, individual images are generated for each section and downloaded.
Simply upload each section image in order to your online store's detail page editor, and you're done!
Web Export

When you choose Web Export, you'll receive a deployed link.
Paste this code into the HTML editor of your own website or platforms like Cafe24 or I'mweb, and the detail page will be applied as-is.
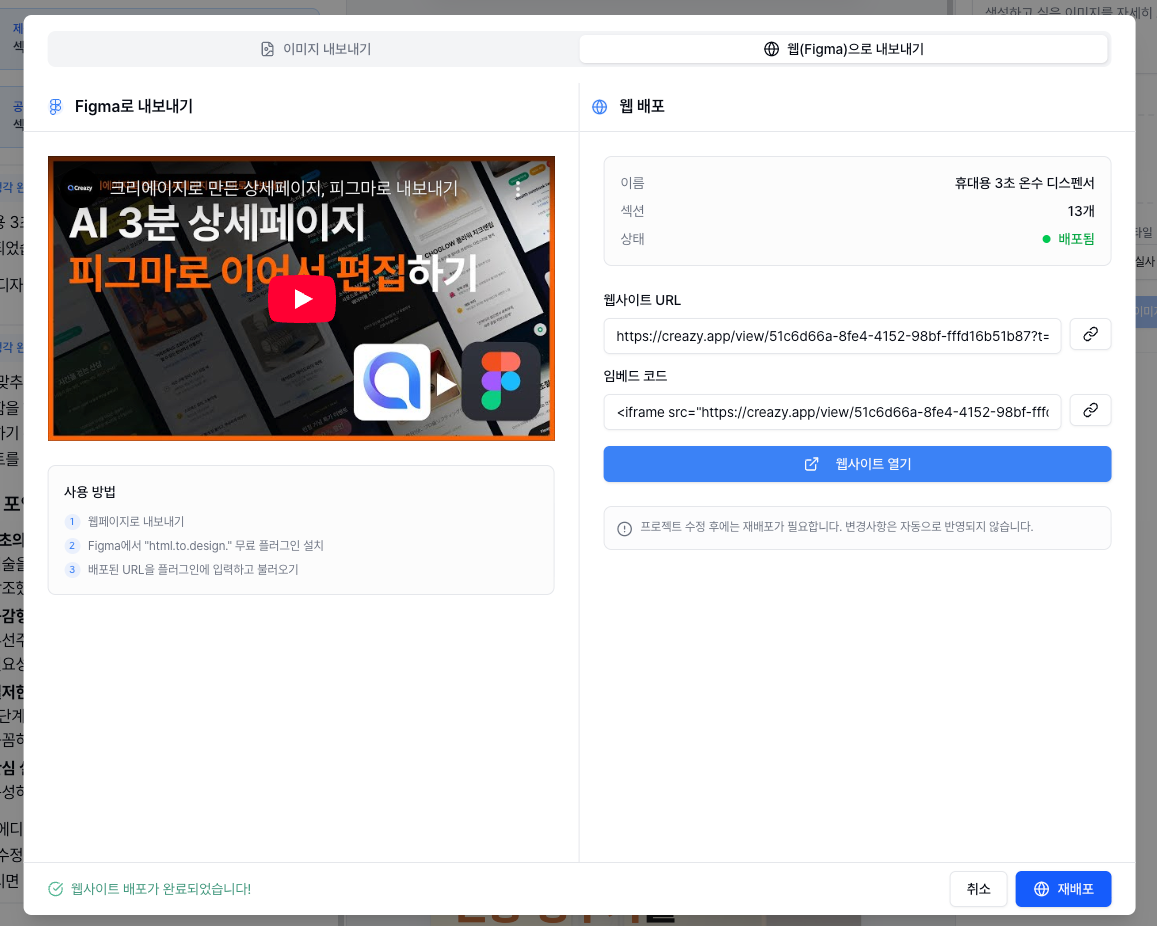
Unlike image export, the text is also indexed by search engines, making it advantageous for SEO.
Video Tutorial
If you prefer watching a video over reading, check out our video tutorial below!
Creazy
makes creating your product detail pages the easiest and fastest way possible.
Feel free to use it anytime! 🚀
Related Posts
[Update & Pricing Plan Renewal Pre-Announcement] Now Even Animated Detail Pages?! April 30 New Features & Pricing Plan Renewal Notice
Hello, this is the Creazy team, your reliable partner for CEOs! 🎉 To help our CEOs create high-quality…
The Standard for Detail Page Color Combinations (with Creazy)
Detail Page Creation: Why Does a Single Color Change Sales? The detail page is the most powerful touchpoint…
Successful vs. Unsuccessful Shopping Mall Detail Pages
The Decisive Difference: Successful vs. Unsuccessful Shopping Mall Detail Pages If you're running an online…