How to Make Product Thumbnails: 5 Steps and 5 Checks Before You Upload
Five steps to turn one product photo into thumbnails for marketplace search results, plus a 5-point checklist to run before you upload. Includes recommended sizes by marketplace and the credit cost.

In a nutshell
- 1. Why make the thumbnail separately? Because it is the 1:1 square main image shown in a product list ↓
- 2. How to make product thumbnails in 5 steps Pick shots from one photo and export at marketplace size ↓
- 3. 5 checks before you upload Shrink them to list size and run five checks ↓
"My product detail page is done. So which picture goes in the search list?"
A product thumbnail should be made separately from the detail page, so it stands out at list size.
1. Why make the thumbnail separately?
A thumbnail is the main image shown in a product list.
Creazy saves thumbnails as 1:1 squares. That is why you make a separate square image for the list instead of reusing a long, vertical detail page image. Both Smart Store and Coupang recommend 1000×1000px for the main image.
Creazy's thumbnail export already lists these sizes by marketplace name.
2. How to make product thumbnails in 5 steps
There are five steps: upload a photo, pick the shots, check them at small size, fix only what needs fixing, then export.
📷 Step 1: Start with one product photo
On the Creazy home screen, pick the Thumbnail tab and upload a product photo. If you already made a detail page, choose Start from an existing project instead.
An existing project brings over the product name, product photos and key features. Photos that AI made for the detail page come along too, so you do not have to type the product information again.
On the first screen, Product planning, check that the name and features are right, then move on.
🗂️ Step 2: Choose which shots, and how many
On the next screen, Shot type, choose the kinds of shots and how many of each.
- Product focus: works best as the main image.
- Model · in use: an extra image that shows the product being used.
- Deal · price: for discounts and sale periods.
- USP point: shows one key benefit in a single line.
Set the count with - / + under each card, and the total count and credits in the top right update right away. Thumbnails cost 5 credits each, so five come to 25 credits.
Not sure which shots to pick? Set a count under Let AI choose. Creazy picks the shot types that suit your product to fill that count. Add anything else you want in the extra requests box, such as "let the product fill most of the frame," then submit.
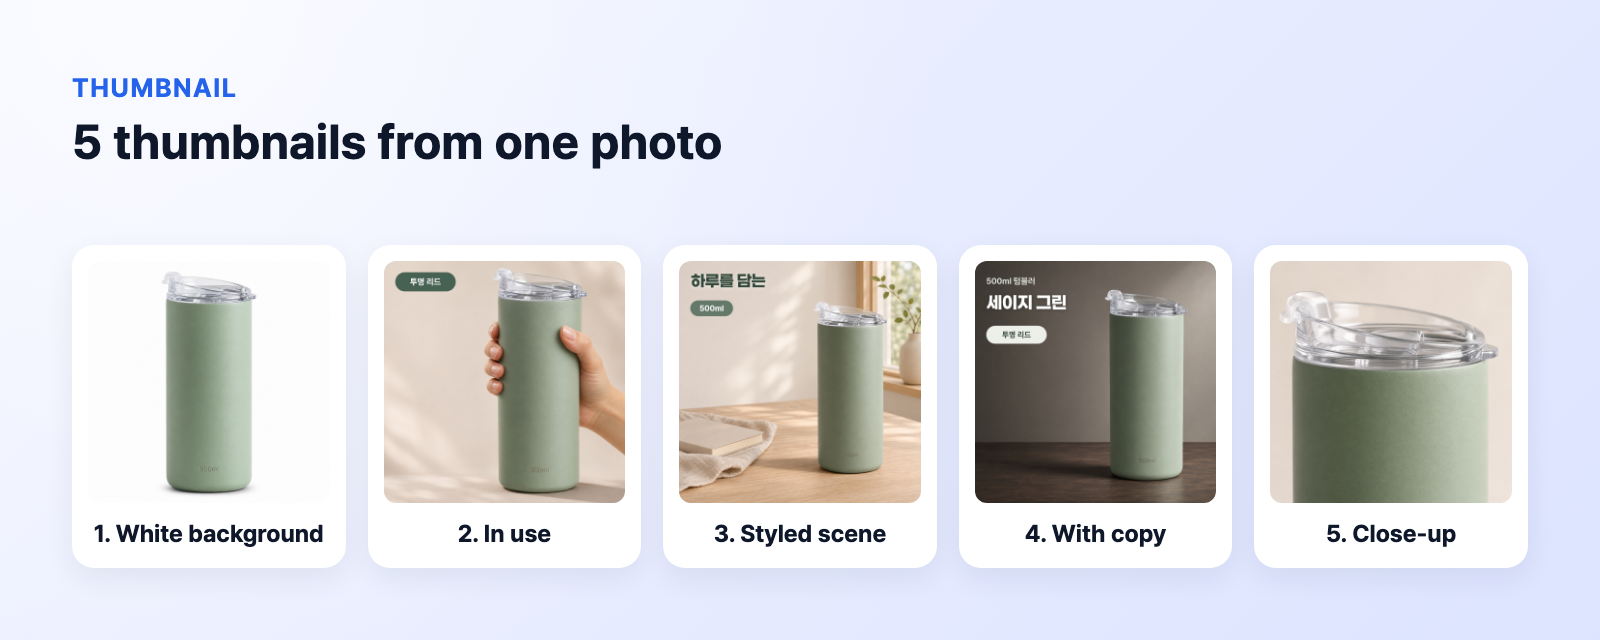
CreazyFive thumbnails made from one tumbler photo (fictional sample product)
🔍 Step 3: Shrink them to list size and pick the main image
A few minutes after you submit, the thumbnails appear one by one and a summary shows up in the chat. Pick the main image at mobile list size, not on a big screen.
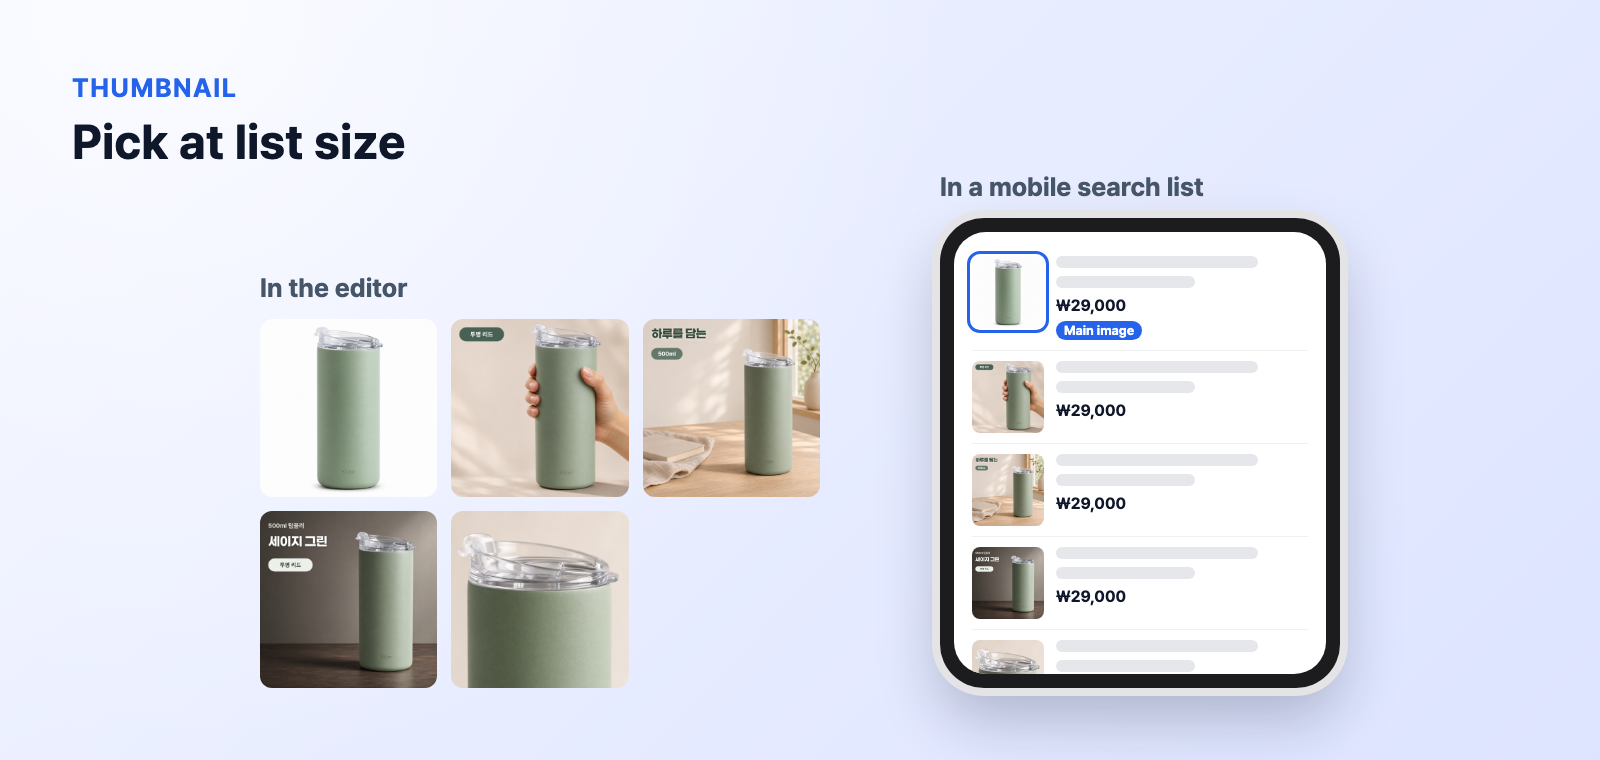
CreazyThe same thumbnails side by side at search list size
At small size, two things become obvious.
- Can you tell what the product is at a glance?
- Is the text still readable?
In this example, shot 1, with the product large on a white background, was the clearest at list size. Shots with text or hands work well as extra images.
✏️ Step 4: Edit only the ones that need it
If only one of the five needs work, use one of the three tools below. Only that image changes; the rest stay as they are.
- To change copy or layout → Edit in chat: above the thumbnail, write it the way you would say it, such as "make the bottom line shorter."
- To touch up the photo → Click the photo: remove the background, crop, flip, generate an AI image or replace the image.
- To add a badge → Assets on the left: drag in badges such as free shipping or best review. Add certification marks such as KC only for products that are actually certified.
📤 Step 5: Export at marketplace size
Click Export in the top right, choose the thumbnails and set the output size. Thumbnails are saved as 1:1 squares.
| Output size | Marketplace |
|---|---|
| 1000×1000 | Smart Store · Coupang etc. |
| 800×800 | 11st |
| 850×850 | Domeme |
| Custom | Your own size |
Pick the marketplace name and the image is saved at that size, so there are no numbers to remember. Image format (PNG and others) and background color are set in the same window.
3. 5 checks before you upload
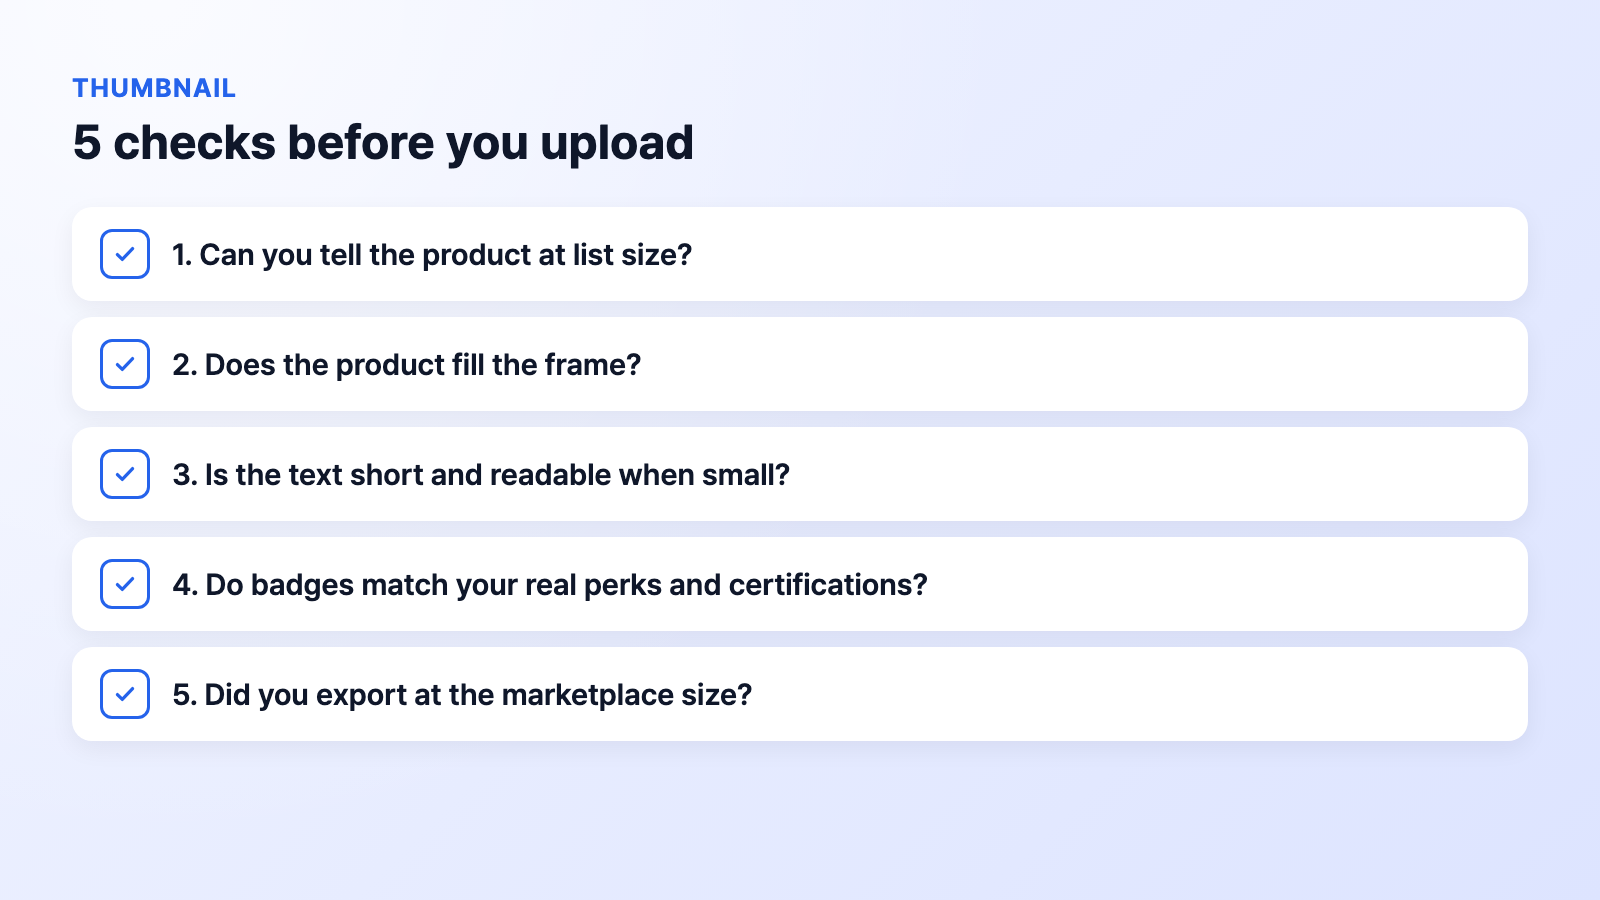
Run through these five before you upload. Judge each one at list size.
- Can you tell what the product is at mobile list size?
- Does the product fill most of the frame?
- Is the text short and readable when small?
- Do badges and marks match your real perks and the certifications you hold?
- Did you export at the marketplace size (1000×1000 etc.)?
Pick a shot that passes all five as your main image. If one check fails, fix just that image with Edit in chat and check again.
FAQ
Are "product thumbnail" and "main image" the same thing?
Yes. Both mean the main image shown in a product list.
Can I make thumbnails without a detail page?
Yes. In the Thumbnail tab, one product photo is enough to start. If you made a detail page first, start from the existing project to bring the product information over.
How many credits does a thumbnail cost?
5 credits per thumbnail. The Shot type screen shows the count and the credits in the top right before you submit.
Related reading
Sources
- Creazy guide: Make thumbnails · Edit and export thumbnails (Korean)
- Coupang Seller Academy listing guide (rechecked November 19, 2026) · Smart Store Center help "Recommended main image size" (checked November 4, 2026)